
Nilou team
Bloom · Bountiful CoresStands in for NahidaTwo Hydro and two Dendro only, which is what Nilou’s Bountiful Cores ask for — Bloom with no other element on the team.

Bubu Pharmacy
Build guide · Genshin Impact
Beyond Mortality
The best Baizhu build in Genshin Impact (Version 7.0) is Everlasting Moonglow with Deepwood Memories, HP% sands, HP% goblet, Healing Bonus circlet. Updated August 22, 2026
Also works: Nocturne's Curtain Call, Surf's Up, Ring of Yaxche, Waveriding Whirl
#1
Elemental Burst
Max first
#2
Elemental Skill
Then
#3
Normal Attack
Next
Two Hydro and two Dendro only, which is what Nilou’s Bountiful Cores ask for — Bloom with no other element on the team.
Genshin Impact 5★ Dendro Catalyst Healer
Everlasting Moonglow is the closest fit on the game's own numbers: Baizhu's kit multiplies HP, and a weapon is ranked here on whether its ascension stat and its passive act on that stat. Jadefall's Splendor, Ash-Graven Drinking Horn and Nocturne's Curtain Call come next. No playtested ranking has been imported for Baizhu, so this is arithmetic over the kit data rather than a damage measurement.
Run Deepwood Memories on Baizhu, with Vourukasha's Glow and Song of Days Past behind it. Main stats are HP% sands, HP% goblet, Healing Bonus circlet. Roll substats in the order Energy Recharge > HP% > CRIT Rate > CRIT DMG.
Talent priority is Elemental Burst > Elemental Skill > Normal Attack. The Elemental Burst costs 80 energy, which is what an Energy Recharge target has to clear.
Baizhu stands in for Nahida in the Nilou team, alongside Nilou, Columbina and Lauma.

Normal Attack Performs up to 4 attacks that deal Dendro DMG to opponents in front of him.
Charged Attack Consumes a certain amount of Stamina to deal AoE Dendro DMG to opponents in front of him after a short casting time.
Plunging Attack Calling upon the might of Dendro, Baizhu plunges towards the ground from mid-air, damaging all opponents in his path. Deals AoE Dendro DMG upon impact with the ground.
Talent level
10 is the cap from materials; C3 and C5 add +3.
| Attribute | 1 | 2 | 3 | 4 | 5 | 6 | 7 | 8 | 9 | 10 | 11 | 12 | 13 | 14 | 15 |
|---|---|---|---|---|---|---|---|---|---|---|---|---|---|---|---|
| 1-Hit DMG | 37.4% | 40.2% | 43.0% | 46.7% | 49.5% | 52.3% | 56.1% | 59.8% | 63.5% | 67.3% | 71.0% | 74.7% | 79.4% | 84.1% | 88.8% |
| 2-Hit DMG | 36.4% | 39.2% | 41.9% | 45.5% | 48.3% | 51.0% | 54.6% | 58.3% | 61.9% | 65.6% | 69.2% | 72.8% | 77.4% | 82.0% | 86.5% |
| 3-Hit DMG | 22.5%×2 | 24.2%×2 | 25.9%×2 | 28.2%×2 | 29.9%×2 | 31.6%×2 | 33.8%×2 | 36.1%×2 | 38.3%×2 | 40.6%×2 | 42.8%×2 | 45.1%×2 | 47.9%×2 | 50.7%×2 | 53.5%×2 |
| 4-Hit DMG | 54.1% | 58.2% | 62.3% | 67.7% | 71.7% | 75.8% | 81.2% | 86.6% | 92.0% | 97.4% | 102.9% | 108.3% | 115.0% | 121.8% | 128.6% |
| Charged Attack DMG | 121.0% | 130.1% | 139.2% | 151.3% | 160.4% | 169.5% | 181.6% | 193.7% | 205.8% | 217.9% | 230.0% | 242.1% | 257.2% | 272.3% | 287.5% |
| Charged Attack Stamina Cost | 50.0 | 50.0 | 50.0 | 50.0 | 50.0 | 50.0 | 50.0 | 50.0 | 50.0 | 50.0 | 50.0 | 50.0 | 50.0 | 50.0 | 50.0 |
| Plunge DMG | 56.8% | 61.5% | 66.1% | 72.7% | 77.3% | 82.6% | 89.9% | 97.1% | 104.4% | 112.3% | 120.3% | 128.2% | 136.1% | 144.1% | 152.0% |
| Low/High Plunge DMG | 113.6%/141.9% | 122.9%/153.5% | 132.1%/165.0% | 145.3%/181.5% | 154.6%/193.1% | 165.2%/206.3% | 179.7%/224.5% | 194.2%/242.6% | 208.8%/260.8% | 224.6%/280.6% | 240.5%/300.4% | 256.3%/320.2% | 272.2%/340.0% | 288.0%/359.8% | 303.9%/379.6% |

Controls a Gossamer Sprite that cruises and attacks nearby opponents, dealing Dendro DMG. After it performs 3 attacks or if there are no opponents nearby, the Sprite will return, healing all nearby party members based on Baizhu's Max HP.
Those in the medical field who can read true signs of illness from false ones may even cure people before any symptoms can show.
Talent level
10 is the cap from materials; C3 and C5 add +3.
| Attribute | 1 | 2 | 3 | 4 | 5 | 6 | 7 | 8 | 9 | 10 | 11 | 12 | 13 | 14 | 15 |
|---|---|---|---|---|---|---|---|---|---|---|---|---|---|---|---|
| Skill DMG | 79.2% | 85.1% | 91.1% | 99.0% | 104.9% | 110.9% | 118.8% | 126.7% | 134.6% | 142.6% | 150.5% | 158.4% | 168.3% | 178.2% | 188.1% |
| Healing | 8.00% Max HP+770 | 8.60% Max HP+847 | 9.20% Max HP+931 | 10.00% Max HP+1021 | 10.60% Max HP+1117 | 11.20% Max HP+1220 | 12.00% Max HP+1329 | 12.80% Max HP+1445 | 13.60% Max HP+1567 | 14.40% Max HP+1695 | 15.20% Max HP+1830 | 16.00% Max HP+1971 | 17.00% Max HP+2119 | 18.00% Max HP+2273 | 19.00% Max HP+2433 |
| CD | 10.0s | 10.0s | 10.0s | 10.0s | 10.0s | 10.0s | 10.0s | 10.0s | 10.0s | 10.0s | 10.0s | 10.0s | 10.0s | 10.0s | 10.0s |

Enters the Pulsing Clarity state, creating a Seamless Shield that absorbs Dendro DMG with 250% effectiveness. While in this state, Baizhu will generate a new Seamless Shield every 2.5s.
The Seamless Shield will heal your own active character based on Baizhu's Max HP and attack opponents by unleashing Spiritveins, dealing Dendro DMG under the following circumstances: · When a character is under the protection of a Seamless Shield and a new Seamless Shield is generated. · When the Seamless Shield's effects expire, or when it is shattered.
If you can perceive the heavens and the earth, defend against malignant auras with the flow of qi, and keep your mind clear, surely nothing can hinder you.
Talent level
10 is the cap from materials; C3 and C5 add +3.
| Attribute | 1 | 2 | 3 | 4 | 5 | 6 | 7 | 8 | 9 | 10 | 11 | 12 | 13 | 14 | 15 |
|---|---|---|---|---|---|---|---|---|---|---|---|---|---|---|---|
| Seamless Shield DMG Absorption | 0.80% Max HP+77 | 0.86% Max HP+85 | 0.92% Max HP+93 | 1.00% Max HP+102 | 1.06% Max HP+112 | 1.12% Max HP+122 | 1.20% Max HP+133 | 1.28% Max HP+144 | 1.36% Max HP+157 | 1.44% Max HP+169 | 1.52% Max HP+183 | 1.60% Max HP+197 | 1.70% Max HP+212 | 1.80% Max HP+227 | 1.90% Max HP+243 |
| Seamless Shield Duration | 2.5s | 2.5s | 2.5s | 2.5s | 2.5s | 2.5s | 2.5s | 2.5s | 2.5s | 2.5s | 2.5s | 2.5s | 2.5s | 2.5s | 2.5s |
| Seamless Shield Healing | 5.20% Max HP+501 | 5.59% Max HP+551 | 5.98% Max HP+605 | 6.50% Max HP+664 | 6.89% Max HP+726 | 7.28% Max HP+793 | 7.80% Max HP+864 | 8.32% Max HP+939 | 8.84% Max HP+1018 | 9.36% Max HP+1102 | 9.88% Max HP+1189 | 10.40% Max HP+1281 | 11.05% Max HP+1377 | 11.70% Max HP+1477 | 12.35% Max HP+1582 |
| Spiritvein DMG | 97.1% | 104.3% | 111.6% | 121.3% | 128.6% | 135.9% | 145.6% | 155.3% | 165.0% | 174.7% | 184.4% | 194.1% | 206.3% | 218.4% | 230.5% |
| Pulsing Clarity Duration | 14.0s | 14.0s | 14.0s | 14.0s | 14.0s | 14.0s | 14.0s | 14.0s | 14.0s | 14.0s | 14.0s | 14.0s | 14.0s | 14.0s | 14.0s |
| CD | 20.0s | 20.0s | 20.0s | 20.0s | 20.0s | 20.0s | 20.0s | 20.0s | 20.0s | 20.0s | 20.0s | 20.0s | 20.0s | 20.0s | 20.0s |
| Energy Cost | 80 | 80 | 80 | 80 | 80 | 80 | 80 | 80 | 80 | 80 | 80 | 80 | 80 | 80 | 80 |

Baizhu gains different effects according to the current HP of your current active character: · When their HP is less than 50%, Baizhu gains 20% Healing Bonus. · When their HP is equal to or more than 50%, Baizhu gains 25% Dendro DMG Bonus.

Characters who are healed by Seamless Shields will gain the Year of Verdant Favor effect: Each 1,000 Max HP that Baizhu possesses that does not exceed 50,000 will increase the Burning, Bloom, Hyperbloom, and Burgeon reaction DMG dealt by these characters by 2%, their Lunar-Bloom DMG by 0.7%, and the DMG Bonus provided by Aggravate and Spread by 0.8%. This effect lasts 6s.

When Baizhu is in the party, interacting with certain harvestable items will heal your current active character for 2.5% of Baizhu's Max HP.
Level 90 and every talent to 10
5,377,500
Mora 17 material lines
Ascension to 90
420,000
Mora 9 materials · 6 steps
All 3 talents to 10
4,957,500
Mora 3× the single-talent bill
20,000Mora
40,000Mora
60,000Mora
80,000Mora
100,000Mora
120,000Mora
Total to level 90
420,000 Mora
12,500Mora
17,500Mora
25,000Mora
30,000Mora
37,500Mora
120,000Mora
260,000Mora
450,000Mora
700,000Mora
One talent to 10
1,652,500 Mora
All 3 talents to 10
4,957,500 Mora
C1Universal Diagnosis gains 1 additional charge.
C2When your own active character hits a nearby opponent with their attacks, Baizhu will unleash a Gossamer Sprite: Splice. Gossamer Sprite: Splice will initiate 1 attack before returning, dealing 250% of Baizhu's ATK as Dendro DMG and healing for 20% of Universal Diagnosis's Gossamer Sprite's normal healing. DMG dealt this way is considered Elemental Skill DMG. This effect can be triggered once every 5s.
C3Increases the Level of Holistic Revivification by 3. Maximum upgrade level is 15.
C4For 15s after Holistic Revivification is used, Baizhu will increase all nearby party members' Elemental Mastery by 80.
C5Increases the Level of Universal Diagnosis by 3. Maximum upgrade level is 15.
C6Increases the DMG dealt by Holistic Revivification's Spiritveins by 8% of Baizhu's Max HP. Additionally, when a Gossamer Sprite or Gossamer Sprite: Splice hits opponents, there is a 100% chance of generating one of Holistic Revivification's Seamless Shields. This effect can only be triggered once by each Gossamer Sprite or Gossamer Sprite: Splice.
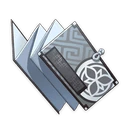
Baizhu's outfit. The cloak on his shoulder is dyed using Changsheng's favorite plants. Its fragrance lingers and soothes the senses.


Names, descriptions and art from the game data. Pick an outfit on the stage to see it full size.