Mitya Build and Best Teams in Genshin 7.2: Weapons, Artifacts and Partners (Early Access)
Mitya, the new 5-star Electro catalyst of Genshin Impact 7.2, builds Elemental Mastery first and crit second, and he fits two very different jobs: a Charged Attack main DPS and an off-field Stellar-Conduct support. IWinToLose Gaming played him at Constellation 0 on the early access creator server and published the result on 30 October 2026, with five weapons, five artifact sets, nine line-ups and five Stygian Onslaught clears. The footage predates release, and the video warns that “things may be subject to change”: every number here is early access. Below, his build, his best weapons and artifacts, the teams he was shown in, and where they agree or disagree with the site’s own data.

Video by
IWinToLose Gaming
The builds, the weapon and team comparisons, the rotations, the clear times and the opinions credited to him on this page come from IWinToLose Gaming’s early access video of 30 October 2026.
TL;DR
- Early access footage: numbers may change before 4 November 2026.
- Build: Elemental Mastery first, then CRIT Rate and CRIT DMG; talents 10/10/10.
- Weapons: Starsealed Edict, then Winter’s Heavy Heart, then Sacrificial Fragments.
- Artifacts: 2 Flower of Paradise Lost + 2 Night of the Sky’s Unveiling, or 4 Disenchantment in Deep Shadow.
- Teams: Odette, Yae Miko and Valeriy; budget Diona, Sucrose and Valeriy; support for Cyno and Wriothesley.
Mitya build: Elemental Mastery first, then crit
The best Mitya build on the Genshin 7.2 early access server, as IWinToLose Gaming shows it, stacks Elemental Mastery and then crit: Sacrificial Fragments or his signature Starsealed Edict, two-piece Flower of Paradise Lost with two-piece Night of the Sky’s Unveiling, Elemental Mastery on the sands and goblet, and CRIT Rate and CRIT DMG in the substats. Every value below was filmed on the creator server before launch.
The reason is on his talent screen. Steady State Core Detonation DMG reads “165.6% Elemental Mastery/Beacon” and the Gradient Beacon consumption hit “144.0% Elemental Mastery”. IWinToLose calls him “basically a pure elemental mastery scaling character” and adds the warning that matters for team building: “a lot of buffers don’t work with him”. ATK buffs do nothing for his own damage.
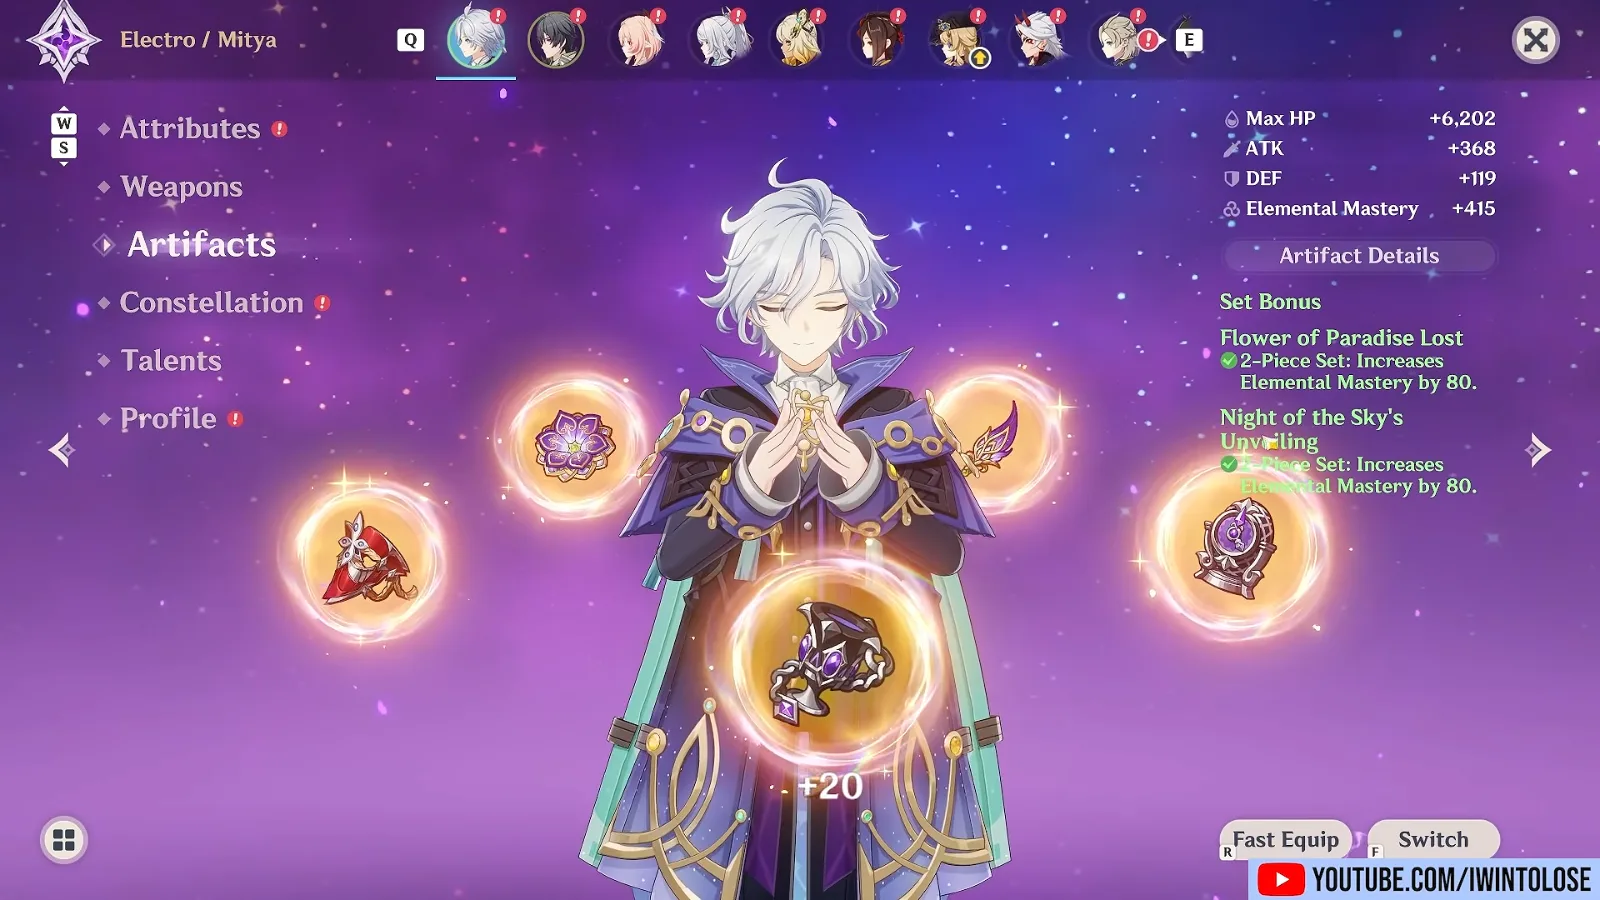
Both two-piece bonuses read “Increases Elemental Mastery by 80”, so the pair is worth 160 on its own, and the attribute screen totals +415 Elemental Mastery from the five pieces. With no artifacts, a level 90 Mitya already shows 100 Elemental Mastery at 2:25, which IWinToLose counts as free base stats, along with CRIT DMG. Add the 221 Elemental Mastery of Sacrificial Fragments and he sits at 736 (100 + 415 + 221) before any team buff.
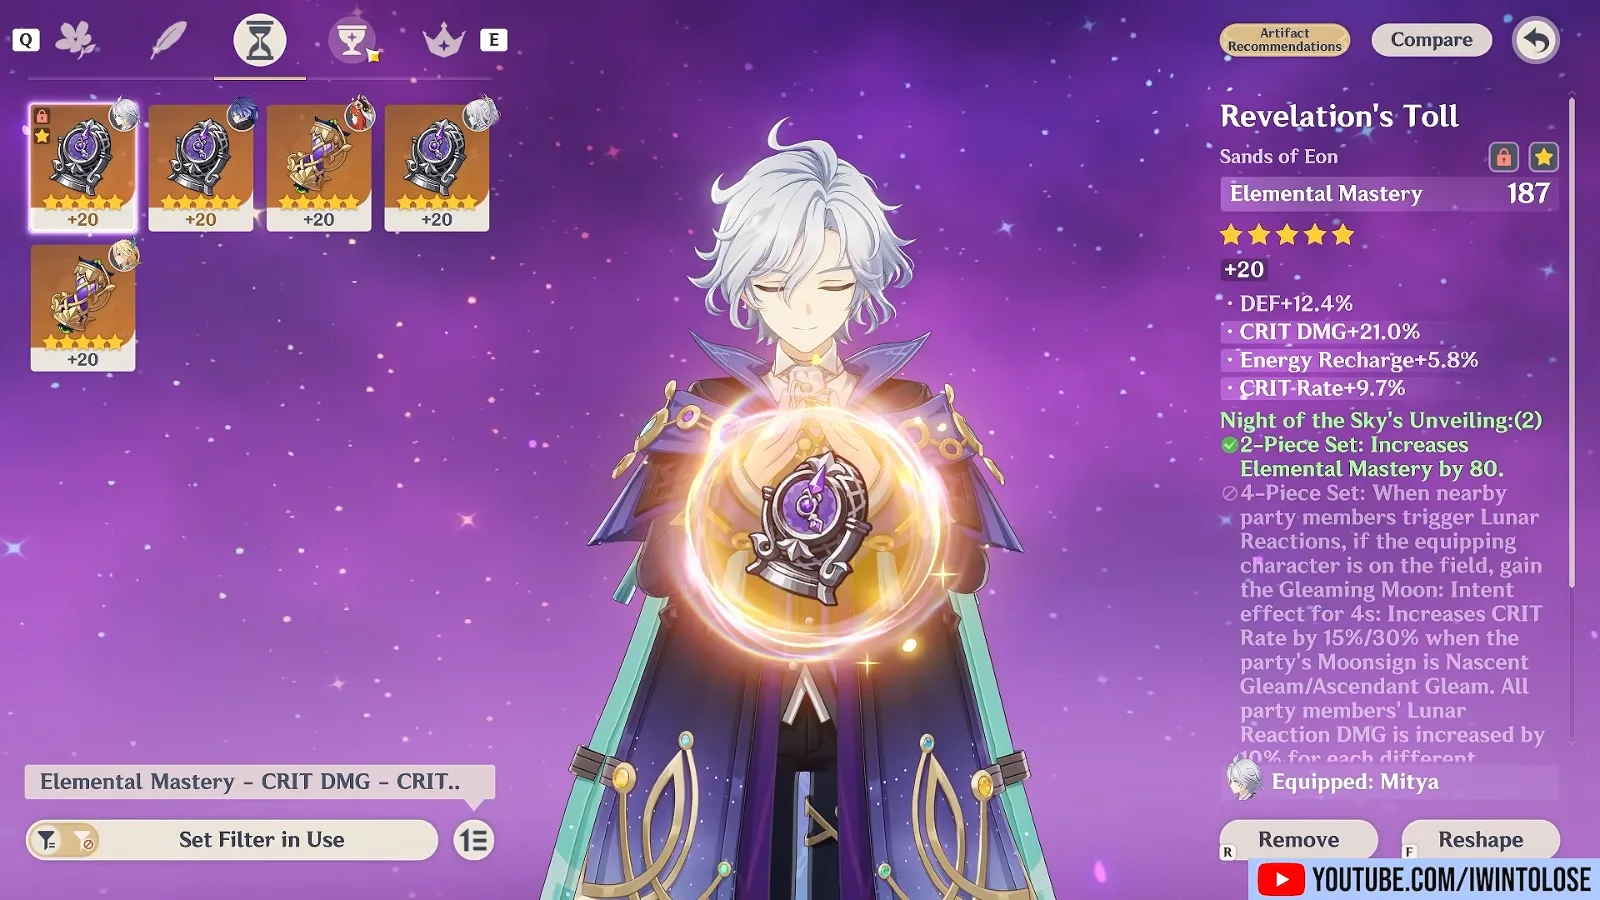
The pieces follow one rule. The Revelation’s Toll sands and the Upon Festivity goblet both carry Elemental Mastery 187 as the main stat, with CRIT Rate and CRIT DMG underneath; the plume adds Elemental Mastery +44, CRIT Rate 12.8% and CRIT DMG 13.2%. IWinToLose sums it up as “elemental mastery, crit rate, and crit damage”. His ascension passive covers part of the CRIT Rate: up to 20% with four Gradient Beacons, which he says stays up “pretty much all the time” after the first rotation.
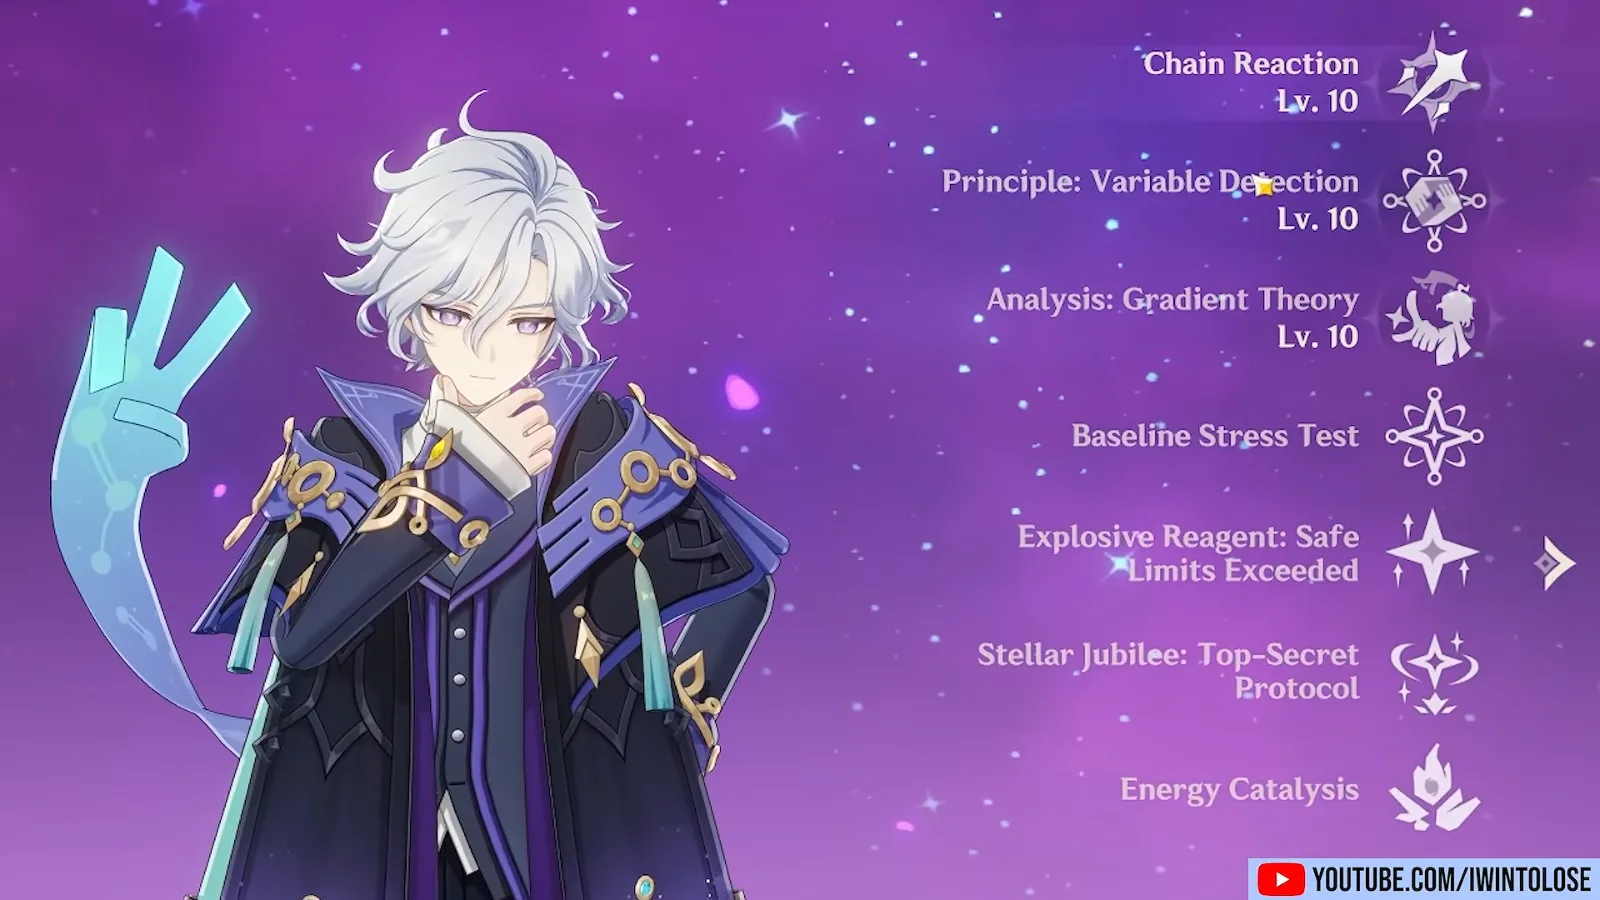
Talents are 10, 10 and 10 throughout, at Constellation 0. The table gathers the build as filmed; the sections after it explain each choice.
| Slot | IWinToLose’s pick | What the screen shows |
|---|---|---|
| Best weapon | Starsealed Edict (5-star) | 542 base ATK, CRIT DMG 88.2% |
| 4-star weapon | Winter’s Heavy Heart R5 | 510 base ATK, CRIT DMG 55.1% |
| Free weapon | Sacrificial Fragments or Blackmarrow Lantern | 454 base ATK, 221 Elemental Mastery |
| Artifacts (damage) | 2 Flower of Paradise Lost + 2 Night of the Sky’s Unveiling | +160 Elemental Mastery from the set bonuses |
| Artifacts (alternative) | 4 Disenchantment in Deep Shadow | Stellar-Conduct DMG +40%, CRIT Rate +16% |
| Artifacts (support) | 4 Tenacity of the Millelith or 4 Heart of the Furnace | Party ATK +20%, or party Stellar Glimmer DMG +50% |
| Main stats | Elemental Mastery sands and goblet | 187 Elemental Mastery each |
| Talents | 10 / 10 / 10 at C0 | Talent screen at 3:41 |
Tap or hold: what Mitya’s kit asks of the build
Tap Mitya’s Elemental Skill and he is a support who gives the party up to 120 Elemental Mastery; hold it and he becomes a Charged Attack main DPS who spends Gradient Beacons on Stellar-Conduct shots. The same Elemental Mastery build feeds both, which is why IWinToLose calls him a “dual function” character.
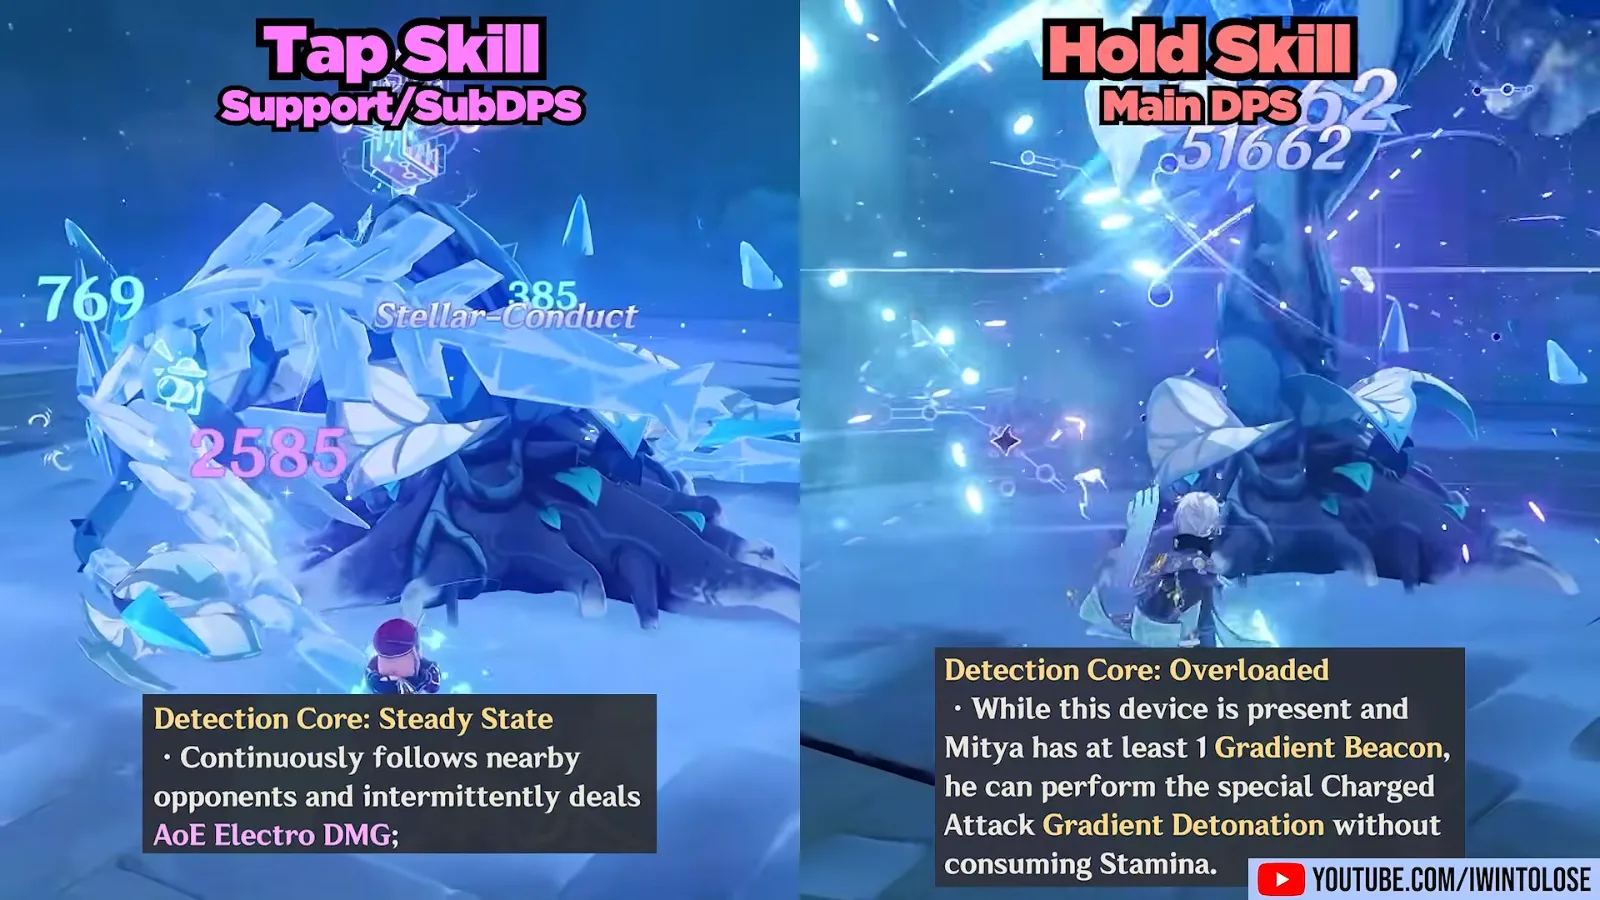
Both versions share the numbers on the Skill Attributes screen: an 18-second cooldown, a Detection Core that lasts 25 seconds, and five Electro particles per cast, per the video’s overlay. For six seconds after casting, pressing the Skill again switches the core between the two states.
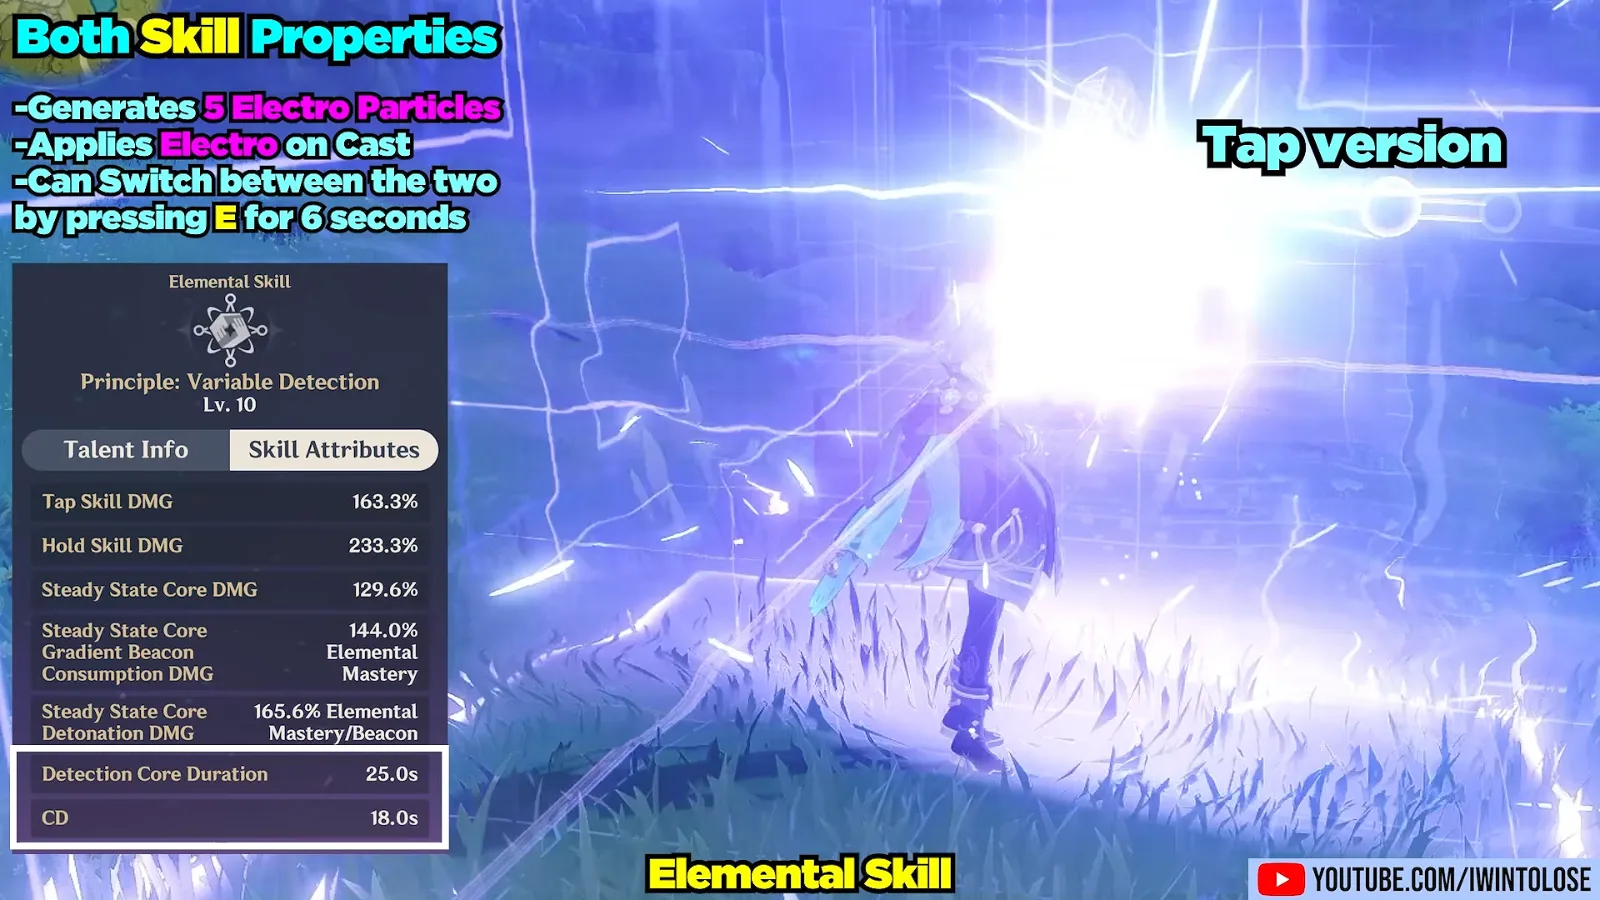
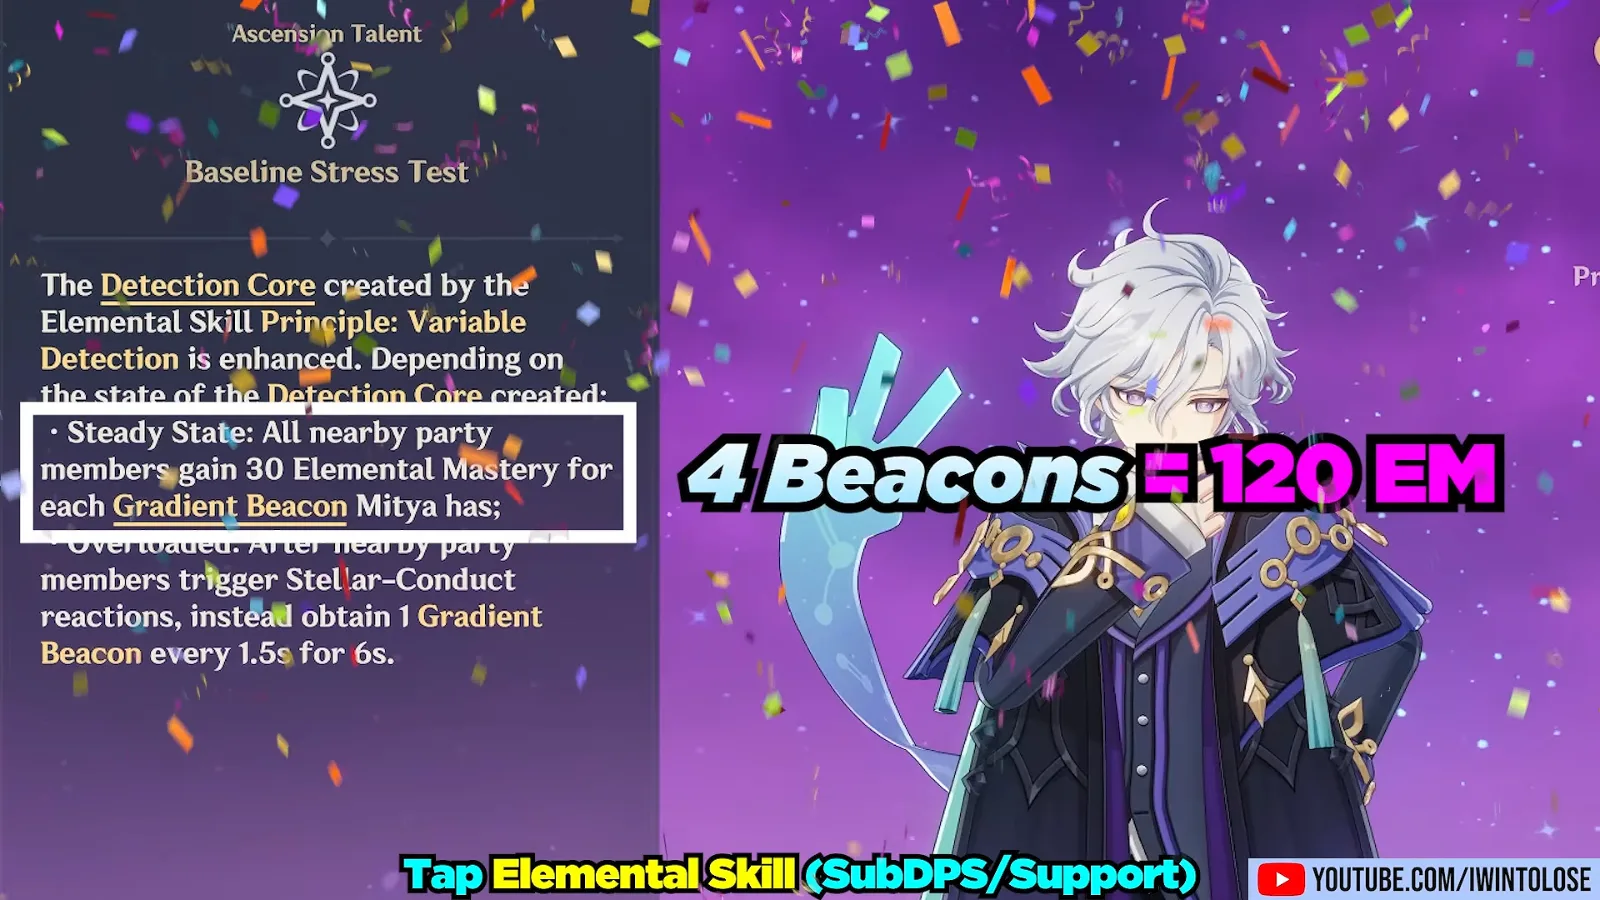
The tap version, Steady State, hits every 1.5 seconds and applies Electro on every other hit, by IWinToLose’s count. Each Stellar-Conduct reaction the party triggers starts beacon generation, up to four, and the ascension passive Baseline Stress Test gives every nearby party member 30 Elemental Mastery per beacon. Four beacons make 120. It takes about six seconds from the first Stellar-Conduct to reach four, and the party has to keep triggering the reaction to hold them. When the core expires or is recast, it detonates for damage scaled on the beacons it holds.
The hold version, Overloaded, lets Mitya fire the special Charged Attack Gradient Detonation without Stamina while he has at least one beacon. Here the beacons come one every 1.5 seconds for six seconds after a Stellar-Conduct, and they keep coming while he is off the field. His Burst, Analysis: Gradient Theory, deals AoE Electro damage and creates three beacons: “rarely used” in support mode, “very useful” for the main DPS, says IWinToLose.
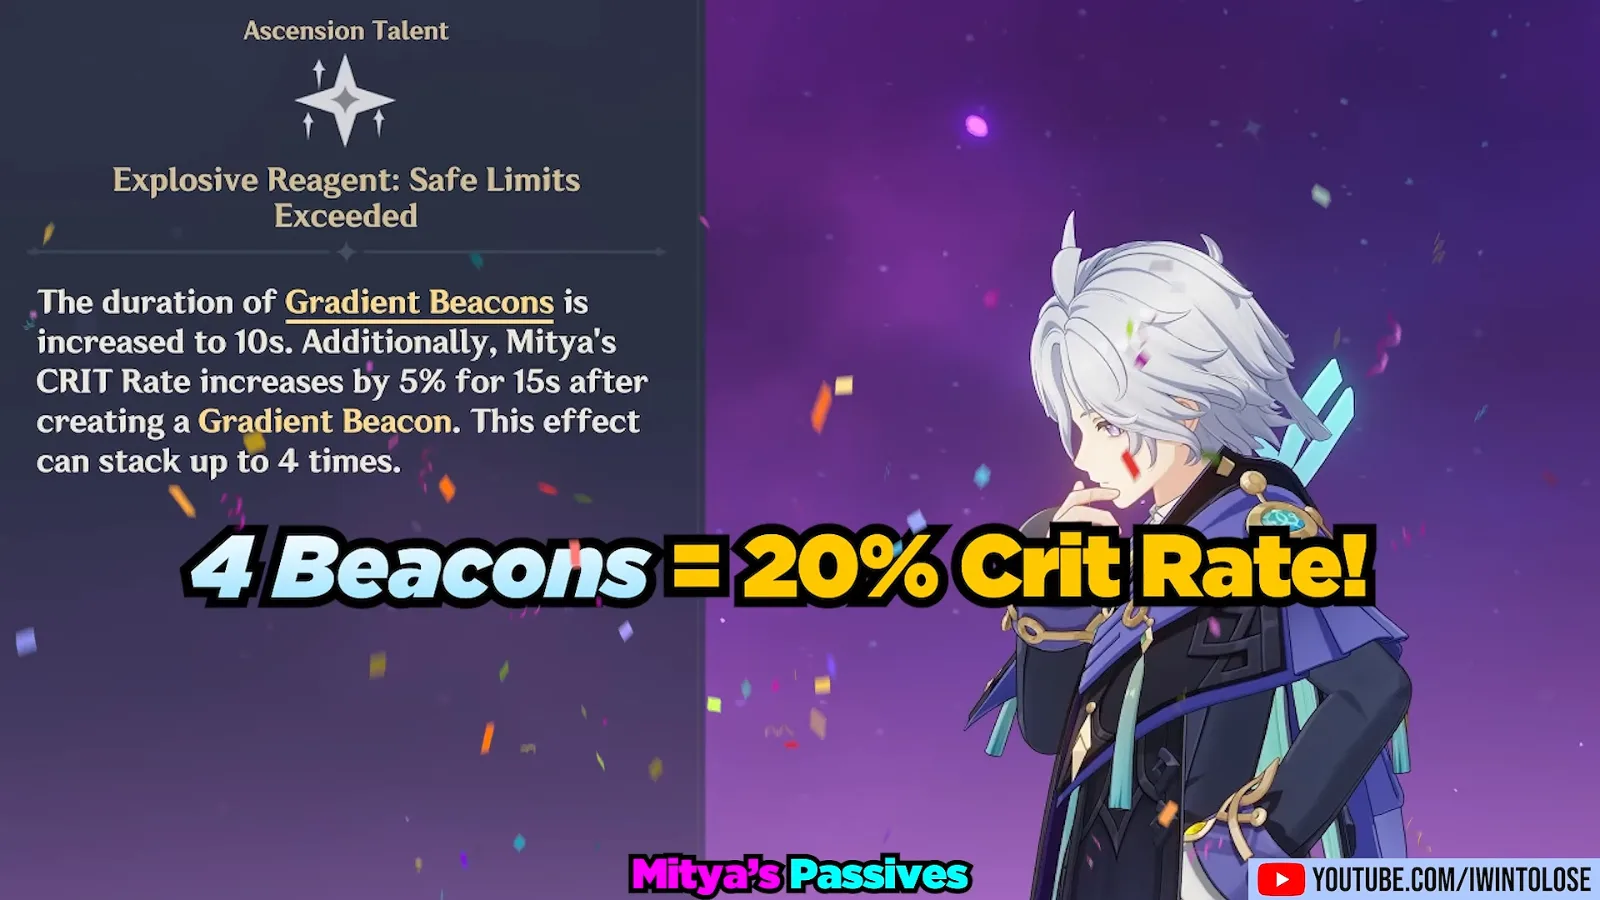
One small disagreement: IWinToLose gives beacons a six-second duration, while the Explosive Reagent text on screen says this passive raises it to 10 seconds. He adds that refreshing the beacons makes the duration rarely matter, so the build is the same either way.
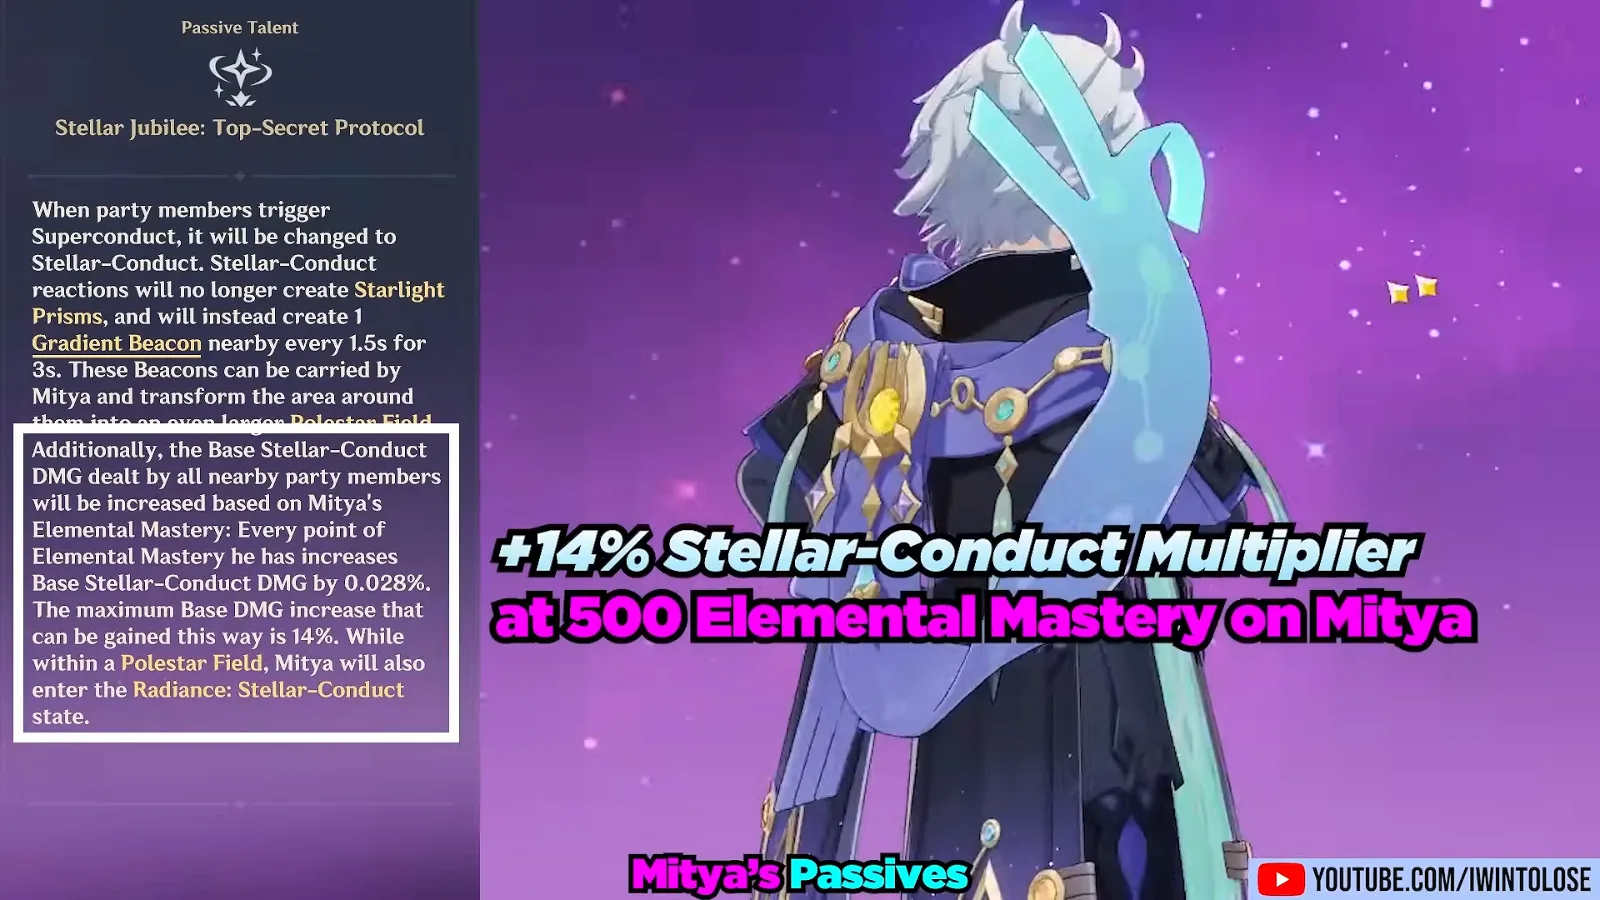
The last passive, Stellar Jubilee: Top-Secret Protocol, turns every Superconduct into Stellar-Conduct and raises the party’s Base Stellar-Conduct DMG by 0.028% per point of Mitya’s Elemental Mastery, up to 14%. That cap arrives at 500 (0.028 × 500 = 14), “which isn’t difficult” for him to reach, in IWinToLose’s words. Past 500, Elemental Mastery still raises Mitya’s own damage and nothing else.
Mitya best weapons: Starsealed Edict, Winter’s Heavy Heart, Sacrificial Fragments
Starsealed Edict is Mitya’s best weapon, Winter’s Heavy Heart is the best 4-star he was shown with, and Sacrificial Fragments is the free-to-play pick, with Blackmarrow Lantern as a stand-in carrying identical stats. IWinToLose compared them on the same Charged Attack string against the Kongamato.
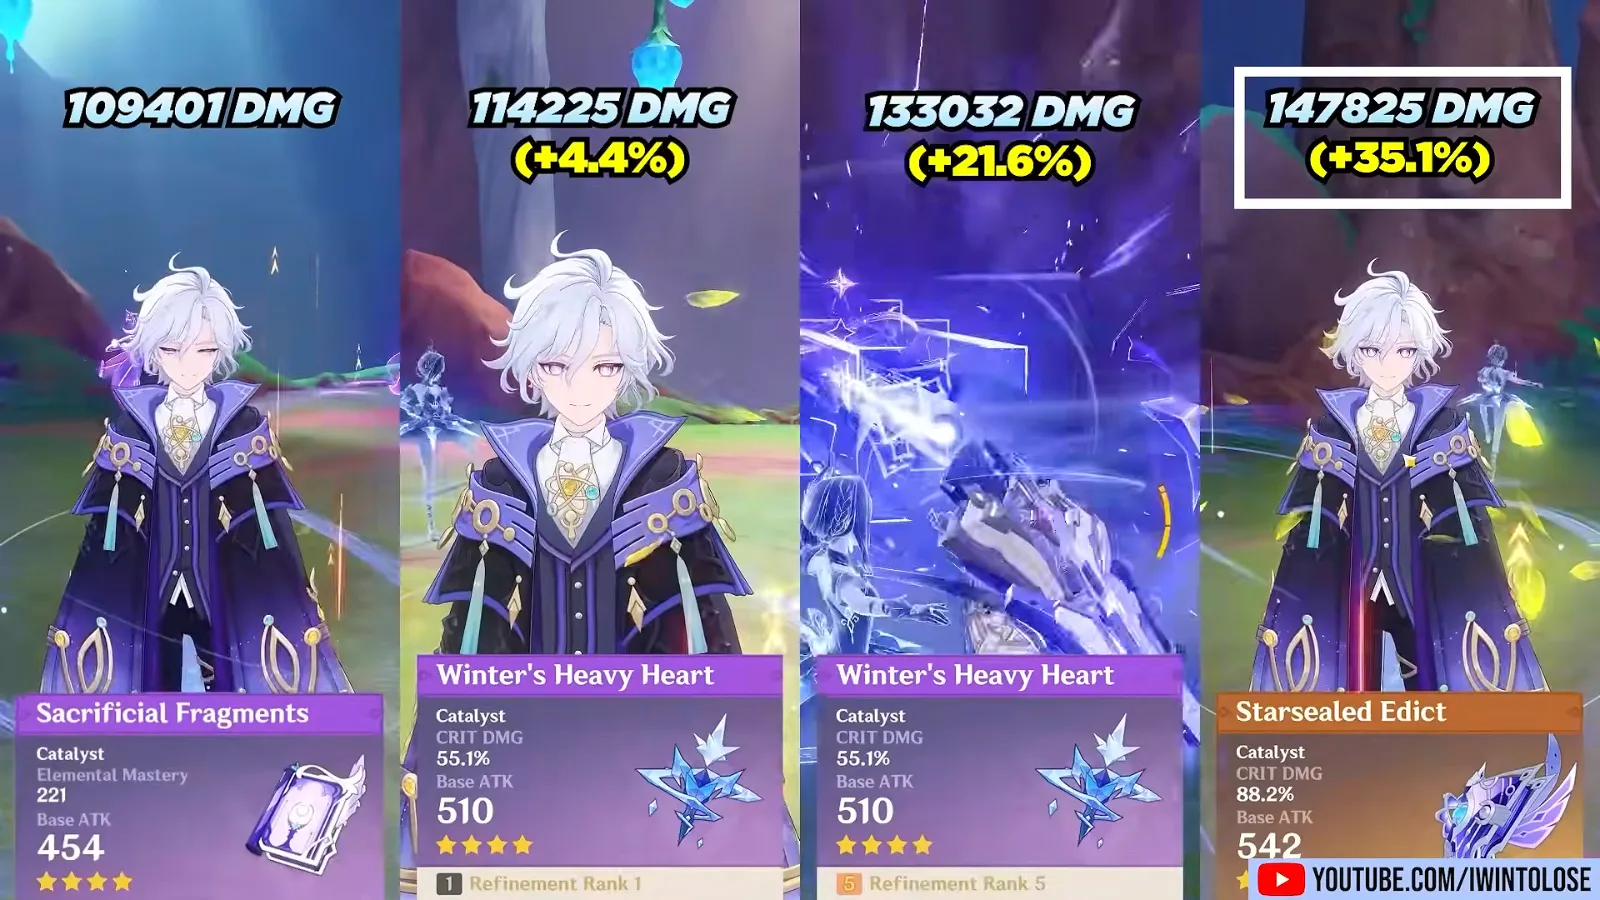
The numbers on screen: Sacrificial Fragments 109,401 damage; Winter’s Heavy Heart at refinement 1, 114,225 (+4.4%); at refinement 5, 133,032 (+21.6%); Starsealed Edict, 147,825 (+35.1%). IWinToLose says he had to try “many, many times” to match the number of Stellar-Conduct stacks, and some clips still fire four shots where others fire five, so read the gaps as one example rather than a ranking to the decimal. His verdict on the signature: “absolutely bonkers”.
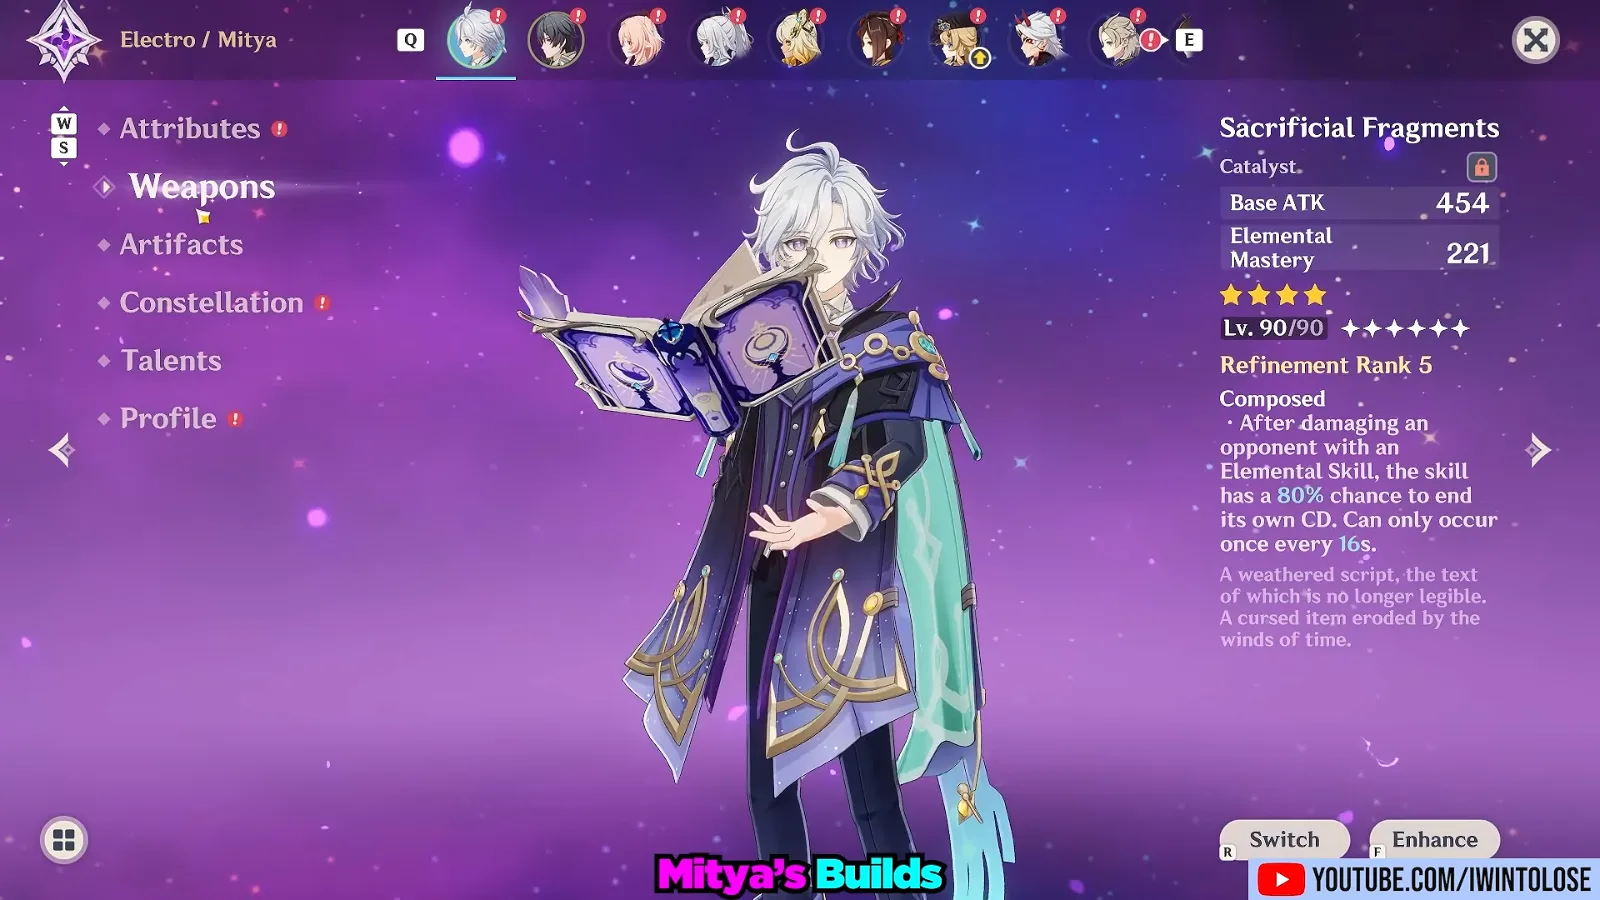
Sacrificial Fragments is the Mitya F2P weapon: 454 base ATK and 221 Elemental Mastery, and a passive that gives his Skill a 40% chance at refinement 1, 80% at refinement 5, to end its own cooldown, once every 30 or 16 seconds. Blackmarrow Lantern has the same 454 base ATK and the same Elemental Mastery in the site’s data, and a passive that only boosts Bloom and Lunar-Bloom, so for Mitya it is the same weapon without the reset. IWinToLose agrees: “the only thing you gain from the sacrificial fragments is that sometimes you can use his skill a little bit earlier.”
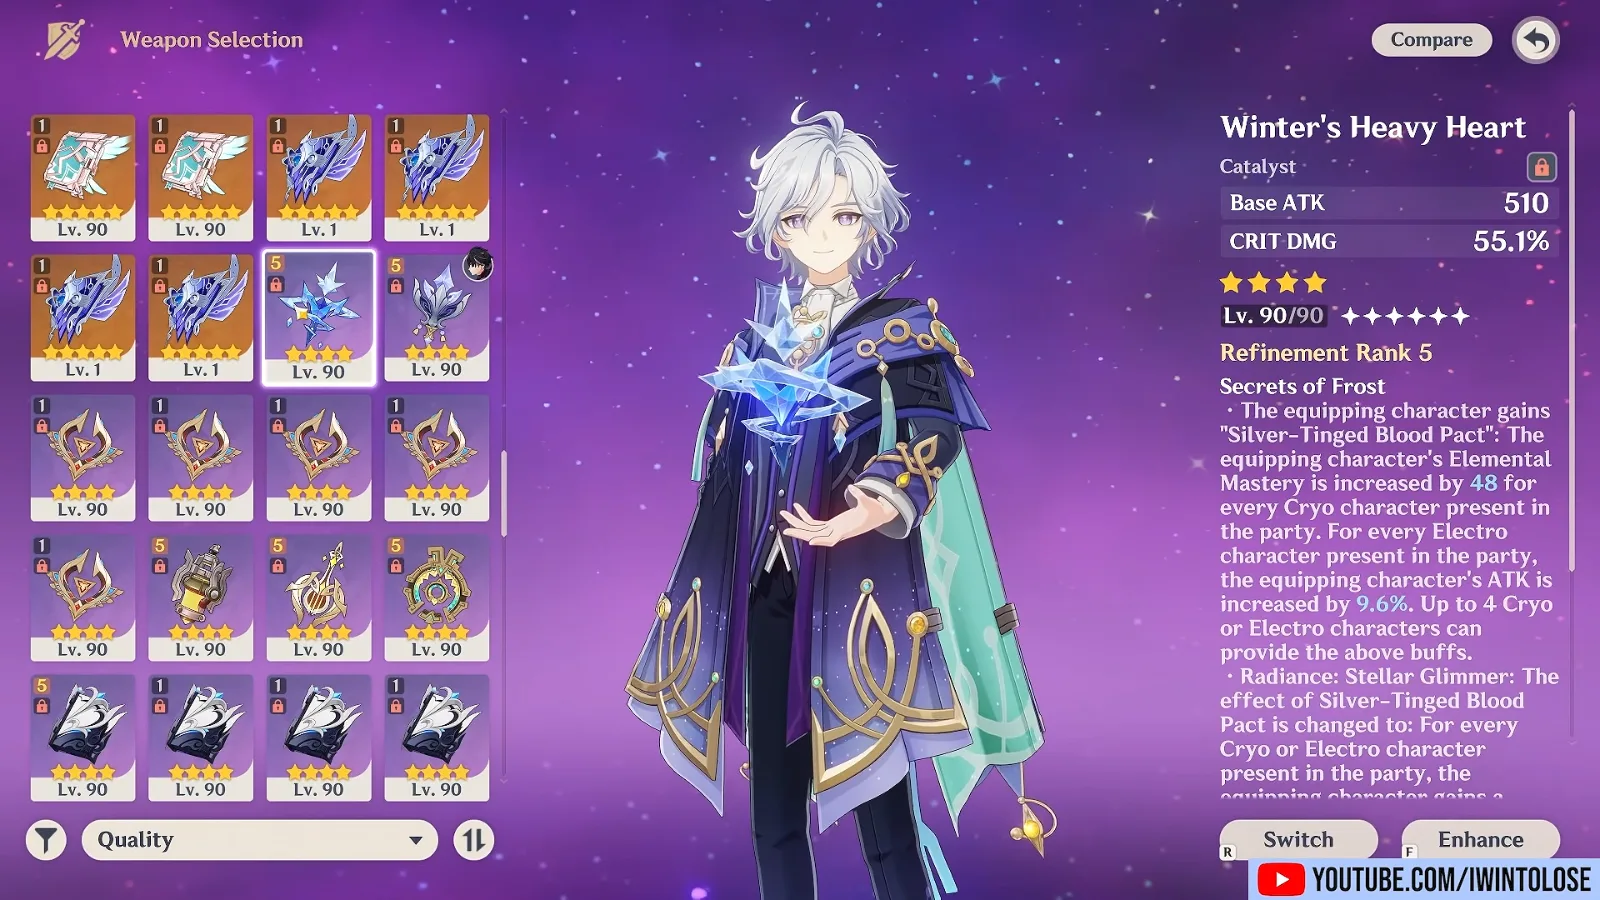
Winter’s Heavy Heart, the 4-star IWinToLose calls “the gacha weapon that recently featured” (it arrived in 7.1, per the site’s weapon data), trades Elemental Mastery for CRIT DMG 55.1%. Its passive is what scales: in a Radiance: Stellar Glimmer state, each Cryo or Electro party member gives 20 Elemental Mastery and 6% Stellar Glimmer reaction DMG at refinement 1, 40 and 12% at refinement 5, for up to four. Mitya enters Radiance: Stellar-Conduct inside a Polestar Field, per his passive, so in an all Cryo and Electro team the R5 copy is worth 160 Elemental Mastery and 48% more Stellar Glimmer damage. Starsealed Edict shows 542 base ATK and CRIT DMG 88.2%; the site has no record of the weapon yet.
For a support Mitya, IWinToLose also uses Thrilling Tales of Dragon Slayers, the 3-star that raises the next character’s ATK by 24% to 48% for 10 seconds. It does nothing for Mitya himself and a lot for an ATK carry such as Sandrone or Cyno.
Mitya best artifacts: two Elemental Mastery two-pieces or Disenchantment in Deep Shadow
For a damage-dealing Mitya, IWinToLose runs two-piece Flower of Paradise Lost with two-piece Night of the Sky’s Unveiling, and rates four-piece Disenchantment in Deep Shadow as “equally viable”. Neither of the first two four-pieces applies to Stellar-Conduct: Flower of Paradise Lost works on the Bloom family and Night of the Sky’s Unveiling on Lunar reactions. Only their 80 Elemental Mastery each counts.
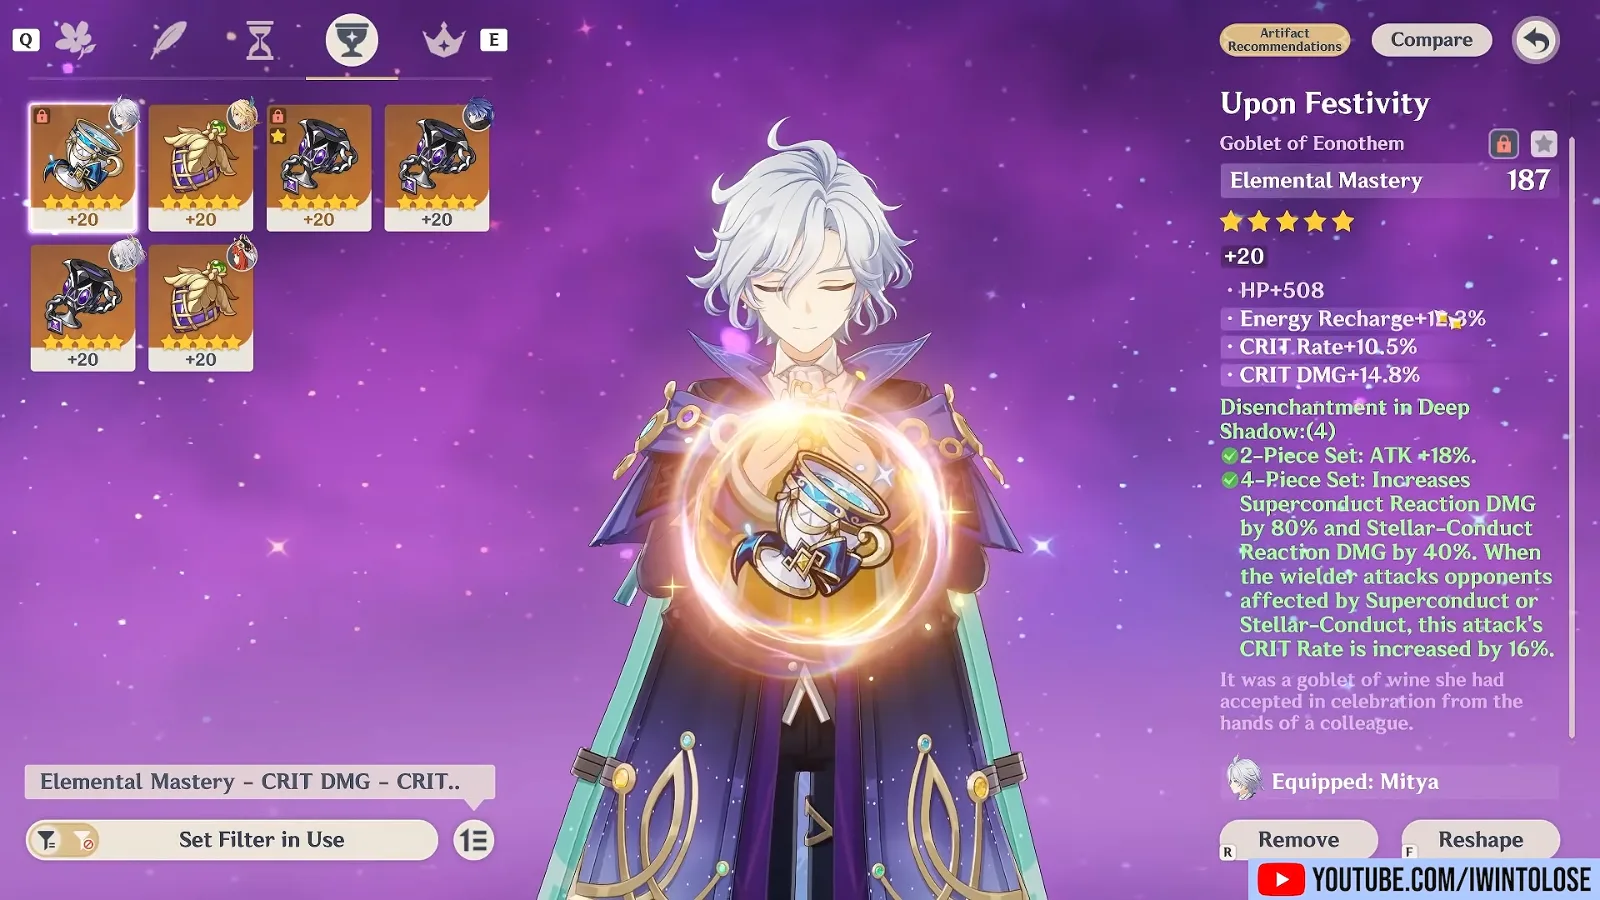
The four-piece Disenchantment in Deep Shadow text, as filmed: Superconduct reaction DMG +80%, Stellar-Conduct reaction DMG +40%, and +16% CRIT Rate on attacks against opponents affected by Superconduct or Stellar-Conduct. Its two-piece is ATK +18%, which a character scaling on Elemental Mastery cannot use, so it is the full set or nothing. The trade against the 2+2 is 160 Elemental Mastery for a damage bonus and more crit.
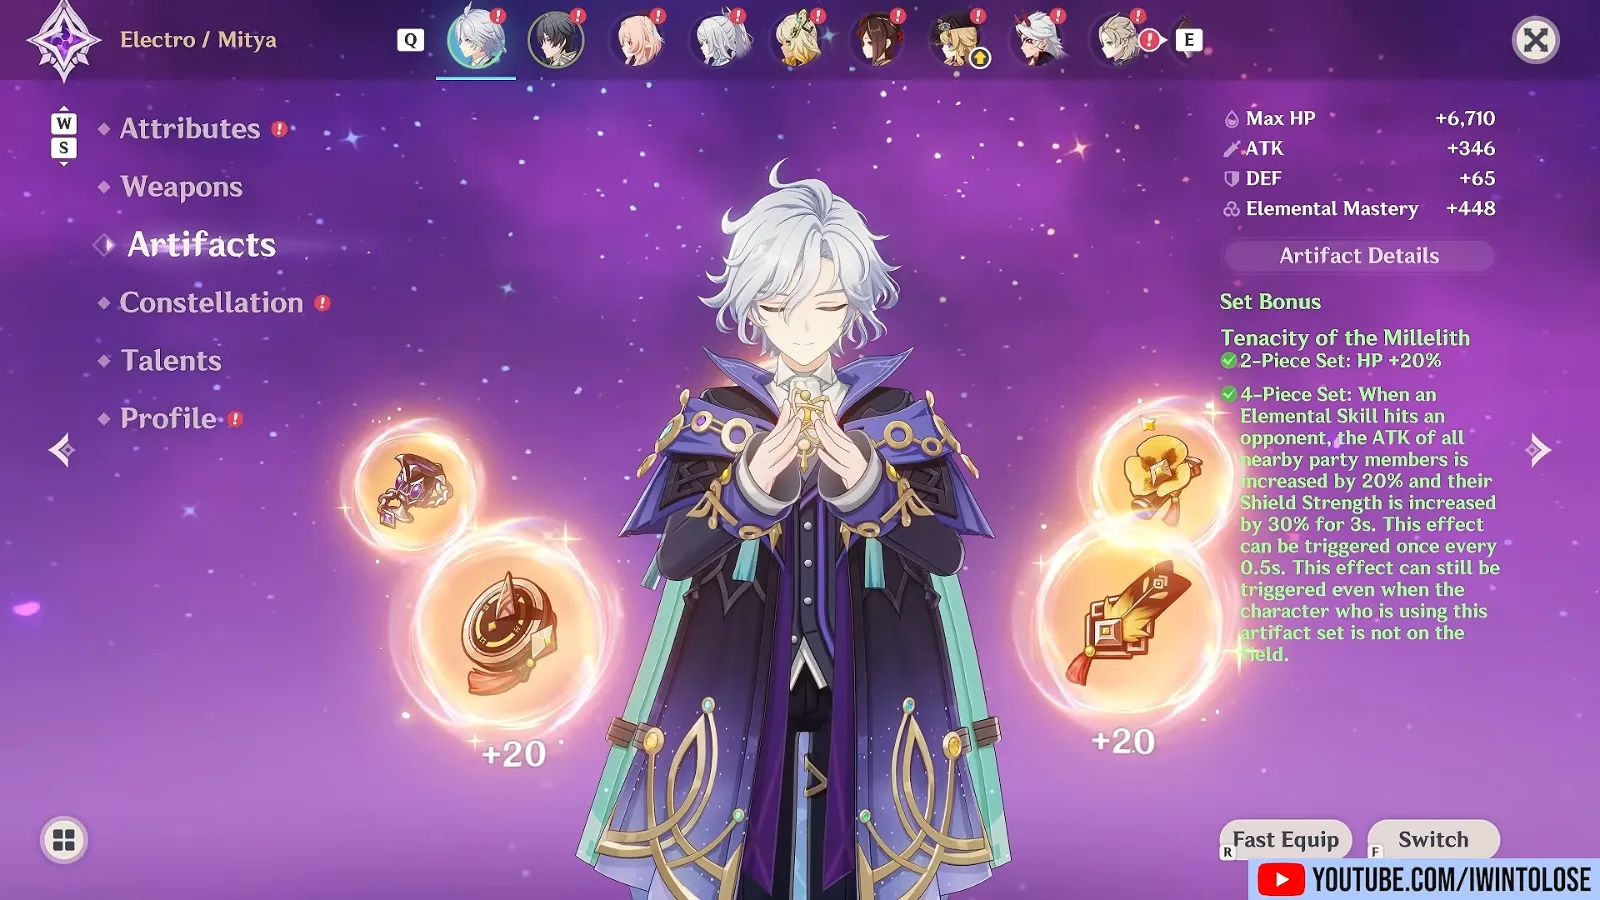
Two support sets appear in the team clips. Four-piece Tenacity of the Millelith raises all party members’ ATK by 20% and shield strength by 30% for three seconds when his Skill hits, and it works off the field; the pieces still give +448 Elemental Mastery. That suits ATK carries such as Sandrone, Cyno and Wriothesley. Four-piece Heart of the Furnace, worn in the Cyno clip, raises the Stellar Glimmer reaction damage of all nearby party members by 50%, also from off the field. IWinToLose says Mitya “can use a ton of different artifact sets”, and the clear times bear that out.
Main DPS Mitya: four shots or five, and the rotation that fixes it
As a main DPS, Mitya’s damage is counted in Charged Attack shots, and each string fires four or five depending on whether a new Gradient Beacon arrives in time. He holds four beacons at most, and one more comes every 1.5 seconds. IWinToLose estimates a window of “3/4 of a second to 1ish second” between the first and third shot for the fifth beacon to land.
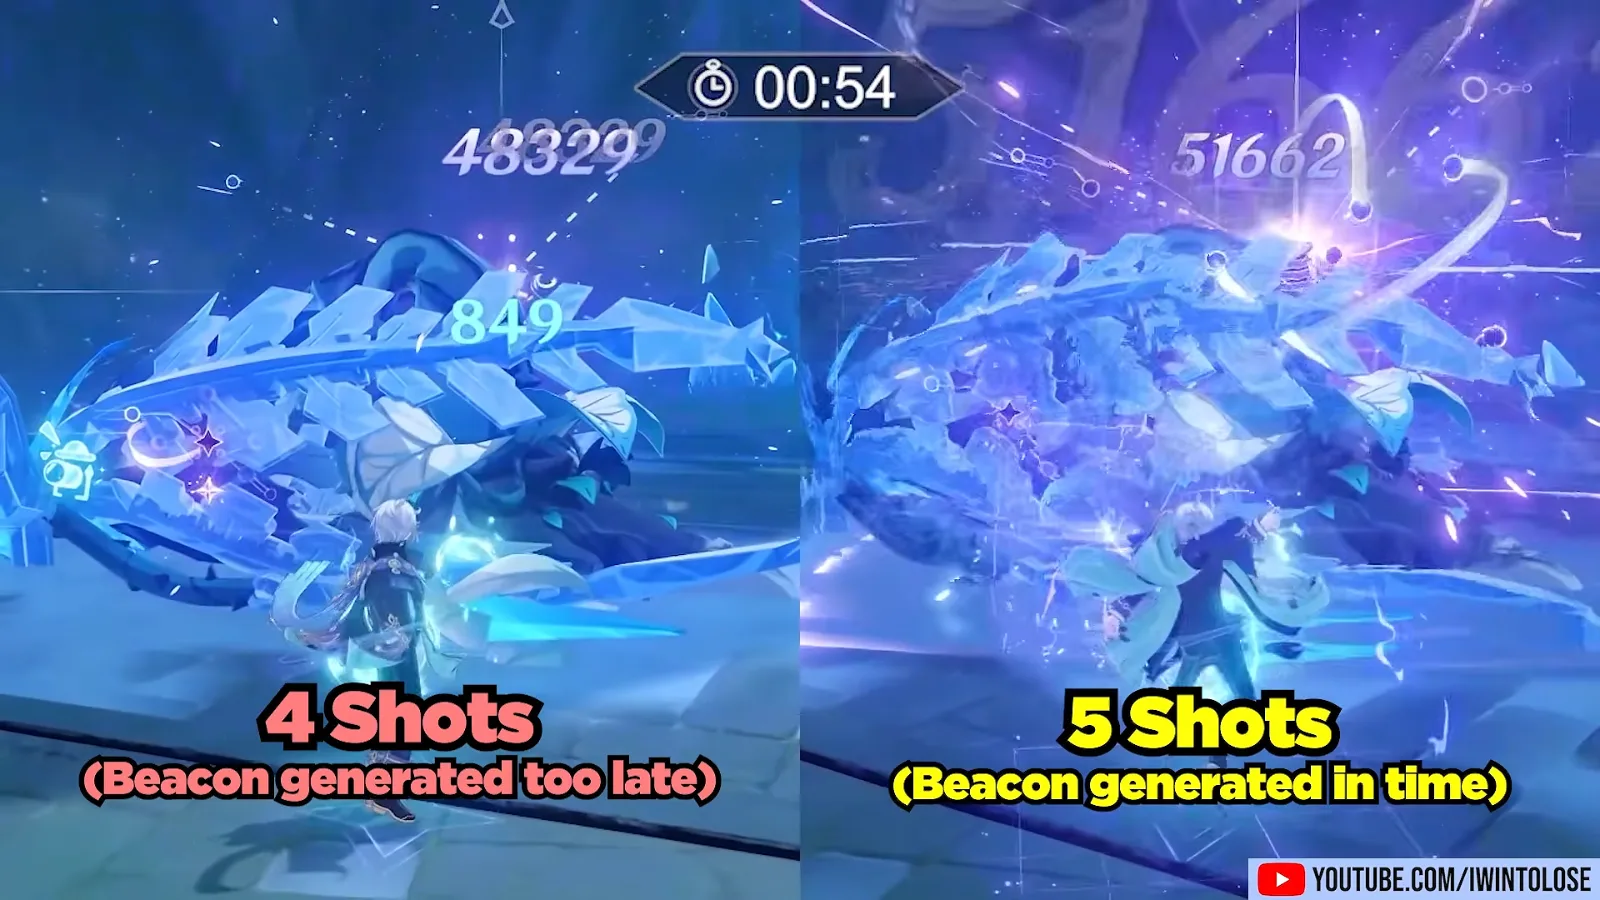
He then times two rotations with Odette, Yae Miko and Valeriy. One character after another gives 12 shots by 20.48 seconds on the on-screen stopwatch. Splitting both Mitya’s and Valeriy’s rotations (Yae EEE, Valeriy EC, Mitya Charged Attack and tap E, Odette EE, Valeriy Q, Mitya E swap, Charged Attack, Q, Charged Attack) gives 15 shots by 19.33 seconds.
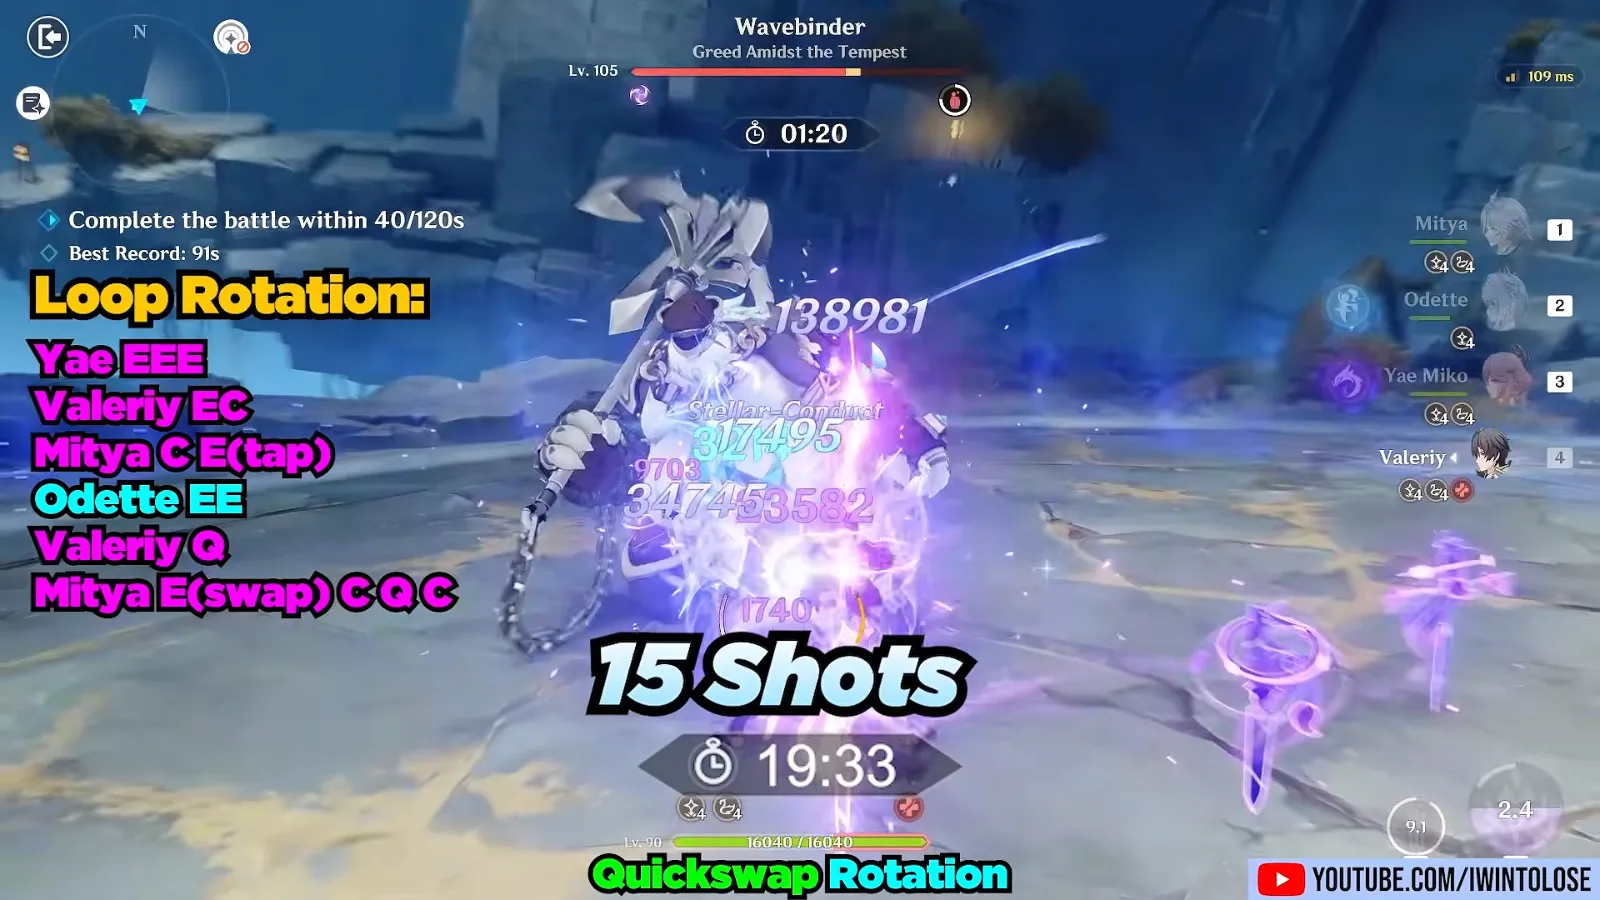
There is a catch: press the Charged Attack too early on swap-in and nothing comes out, too late and you lose damage, and the four-or-five-shot roll may depend on ping. IWinToLose’s advice is plain. If that kind of “nitty-gritty min-maxing” appeals to you, main DPS Mitya is fun; if not, “it’s hard for me to recommend him for that purpose”, and the support role is the one to build for.
Best Mitya teams: Odette, Yae Miko and Valeriy
IWinToLose Gaming names Mitya, Odette, Yae Miko and Valeriy as one of Mitya’s best teams at release, and his budget version keeps Valeriy at C0 with Diona and Sucrose. Valeriy, the new 4-star Electro sword user, is “quite replaceable” at C0 and “an absolute unit” at C6.
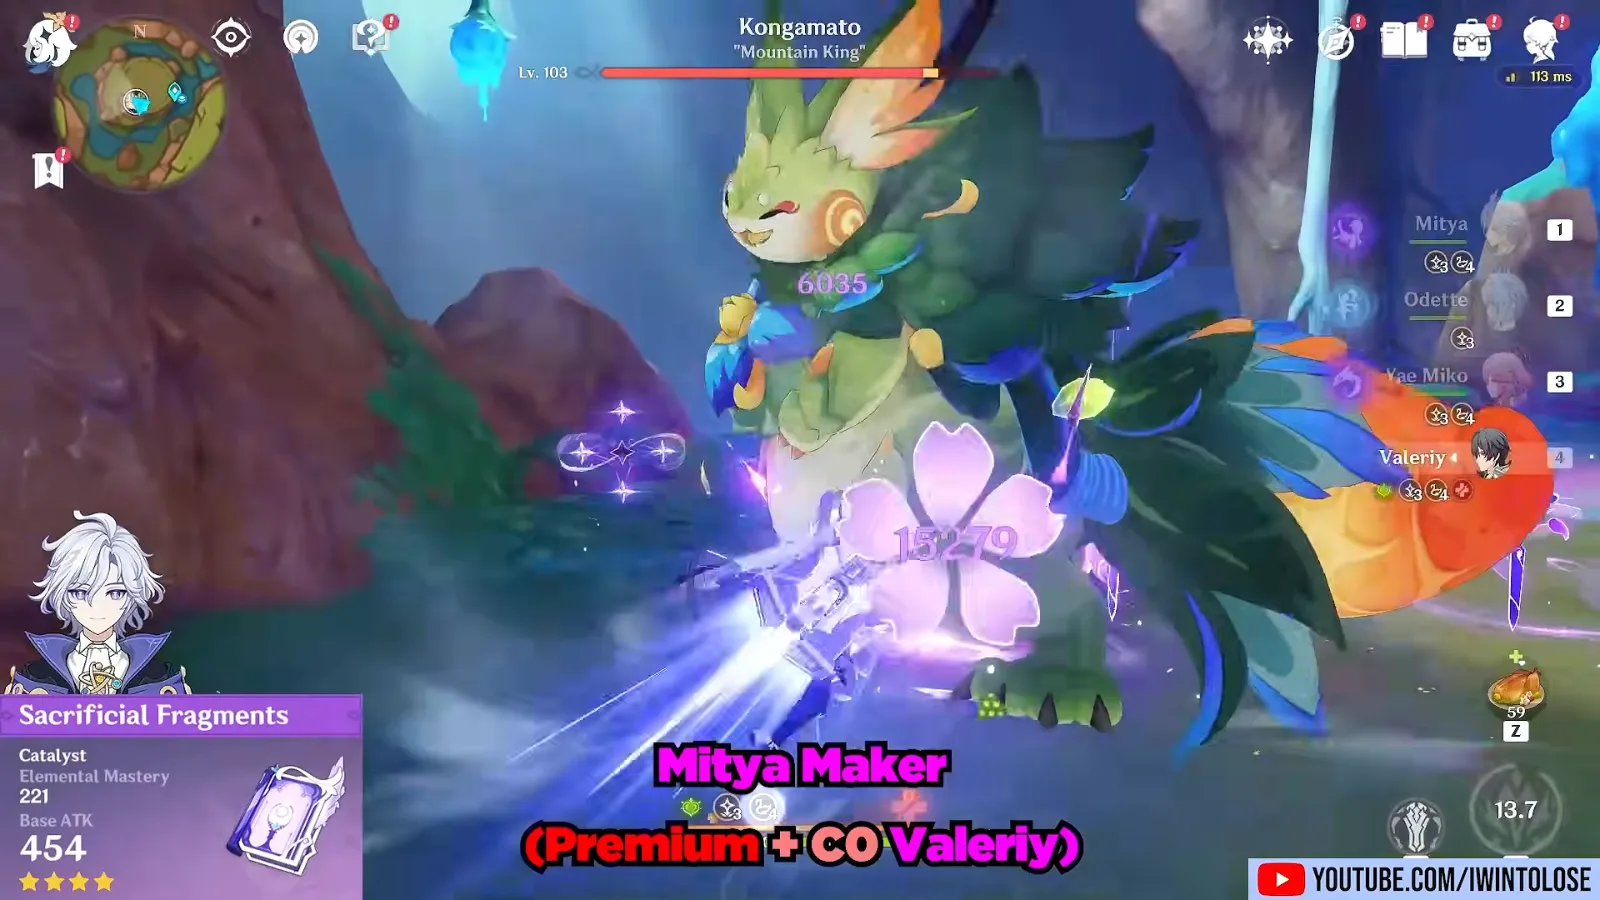
Odette and Yae Miko are the two partners in almost every clip, and both sit at T0 among damage supports on the site’s tier list, Yae at C1. The best Odette teams page already builds around Stellar-Conduct. The table lists every line-up the video shows.
| Team | Mitya’s role | What the video shows |
|---|---|---|
| Mitya, Odette, Yae Miko, Valeriy | Main DPS | “One of his best teams” at release; 90 s on the Wavebinder |
| Mitya, Diona, Sucrose, Valeriy | Main DPS, budget | Blackmarrow Lantern, C0 Valeriy |
| Sandrone, Mitya, Odette, Yae Miko | Support | Tenacity and Thrilling Tales on the Kongamato; 73 s on the Wavebinder with Sacrificial Fragments |
| Cyno, Qiqi, Sucrose, Mitya | Support in Odette’s place | Heart of the Furnace |
| C1 Cyno, Odette, Yae Miko, Mitya | Sub-DPS | R5 Deathmatch on Cyno; 80 s on the Wavebinder |
| Wriothesley, Mitya, Yae Miko, Beidou | Support in Odette’s place | No healer in the team |
| C1 Wriothesley, Odette, Yae Miko, Mitya | Sub-DPS | 83 s on the Wavebinder |
| Cryo Traveler, Mitya, Yae Miko, Odette | Dual DPS | Marked “WIP, has issues” |
| C6 Cryo Traveler, Odette, Yae Miko, Mitya | Sub-DPS | 80 s on the Wavebinder |
Is Diona good for Mitya? The free-to-play team
Diona is the Cryo slot in IWinToLose’s free-to-play Mitya team, beside Sucrose and a C0 Valeriy, and he calls it his best attempt at one. Mitya holds Blackmarrow Lantern in this clip, to prove the point about the two free weapons.
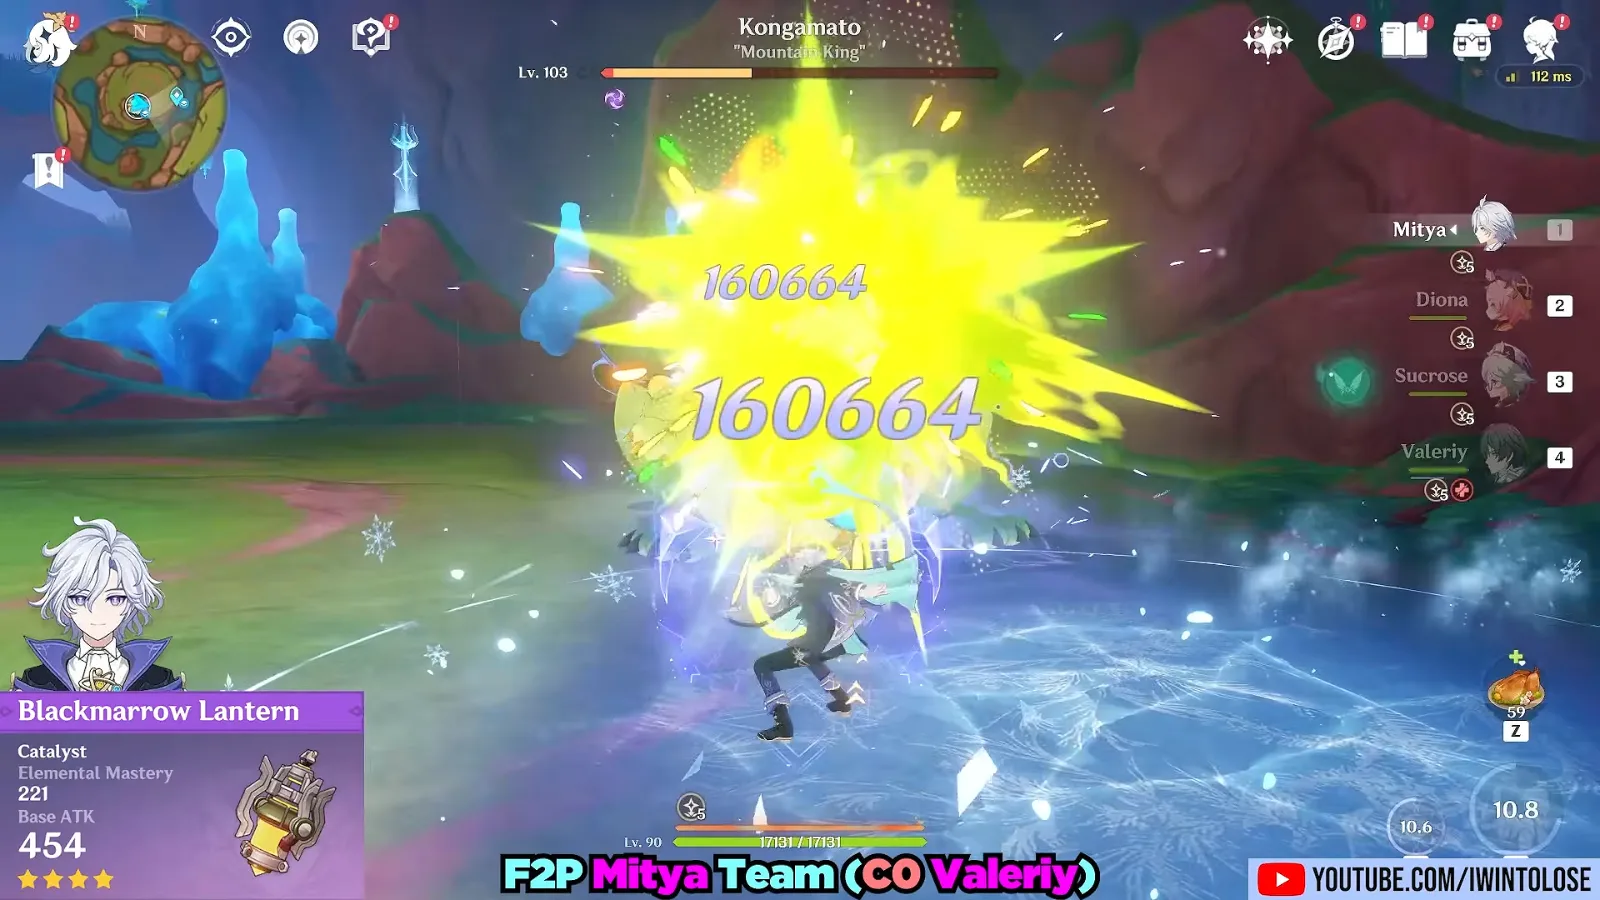
The limit is Diona’s cooldown. IWinToLose says the team is “limited to Diona’s 20 second plus cooldowns”, and the site’s data gives her Burst exactly 20 seconds, so the Sacrificial Fragments reset buys nothing here. Diona has no Stellar-Conduct text of her own in the site’s data: she is a Cryo source with a shield and healing, which is what the team needs. Her build page covers the healing setup. Sucrose brings Elemental Mastery sharing and grouping.
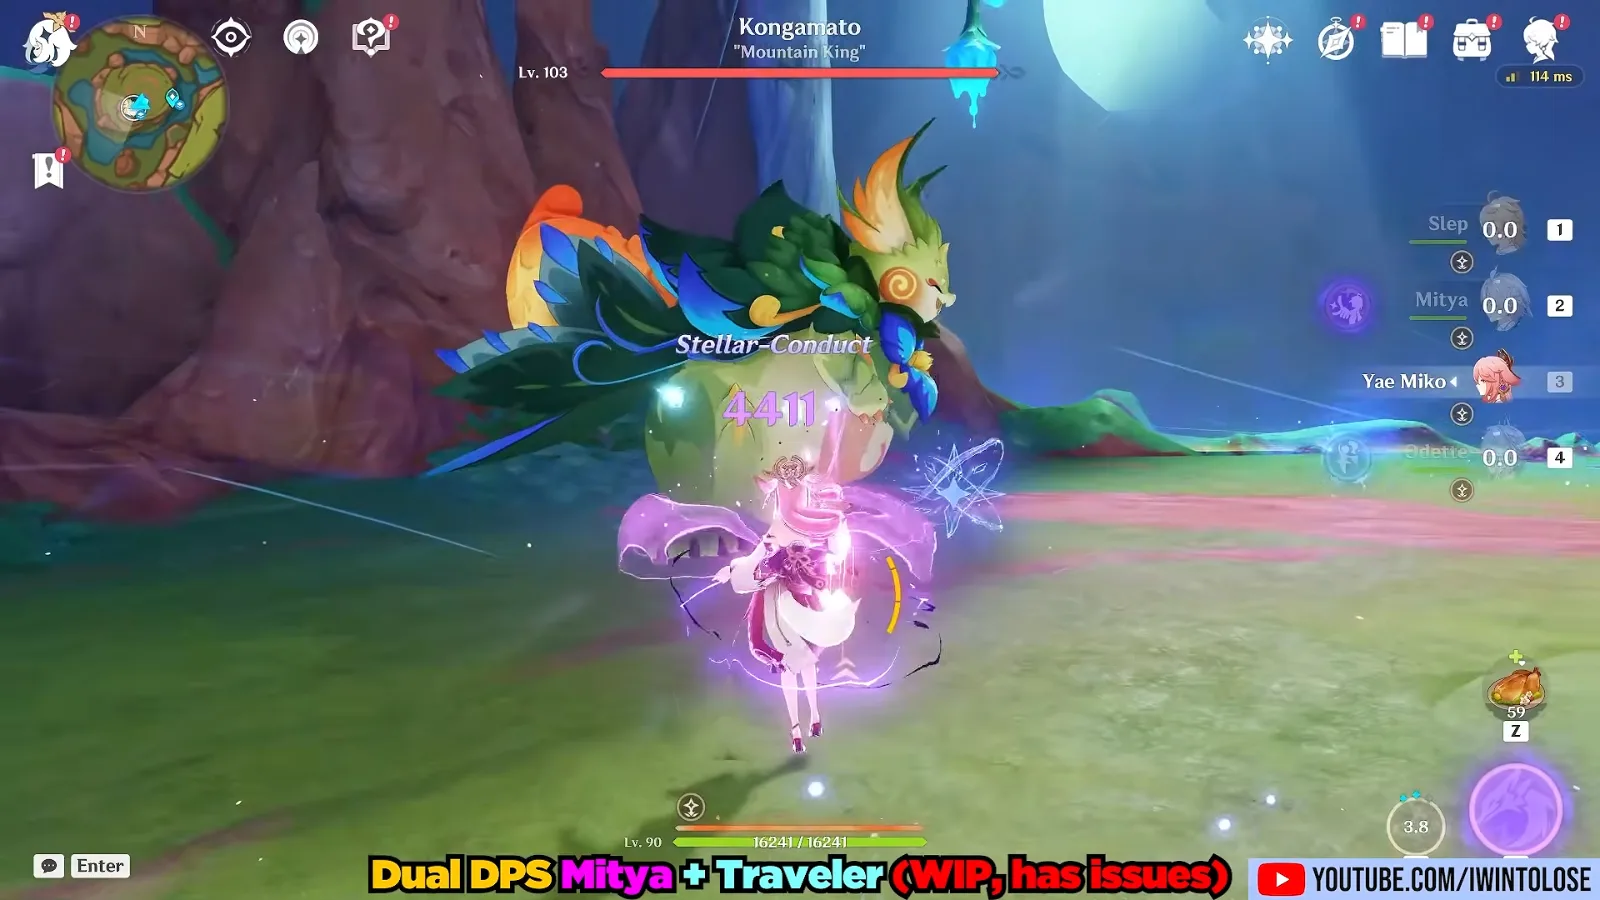
The dual DPS idea with the Cryo Traveler did not go as planned. After switching the core’s mode, IWinToLose “couldn’t swap off of Mitya for 1 second”, which makes the hand-off awkward; he leaves it at “it’s going to require a lot more labbing”.
Mitya with Sandrone, Cyno, Wriothesley and Qiqi
Mitya works as an Odette substitute for Cyno and Wriothesley, and as an alternative to C1 Yae Miko for Sandrone, according to IWinToLose Gaming. The Sandrone test is the cleanest comparison in the video.
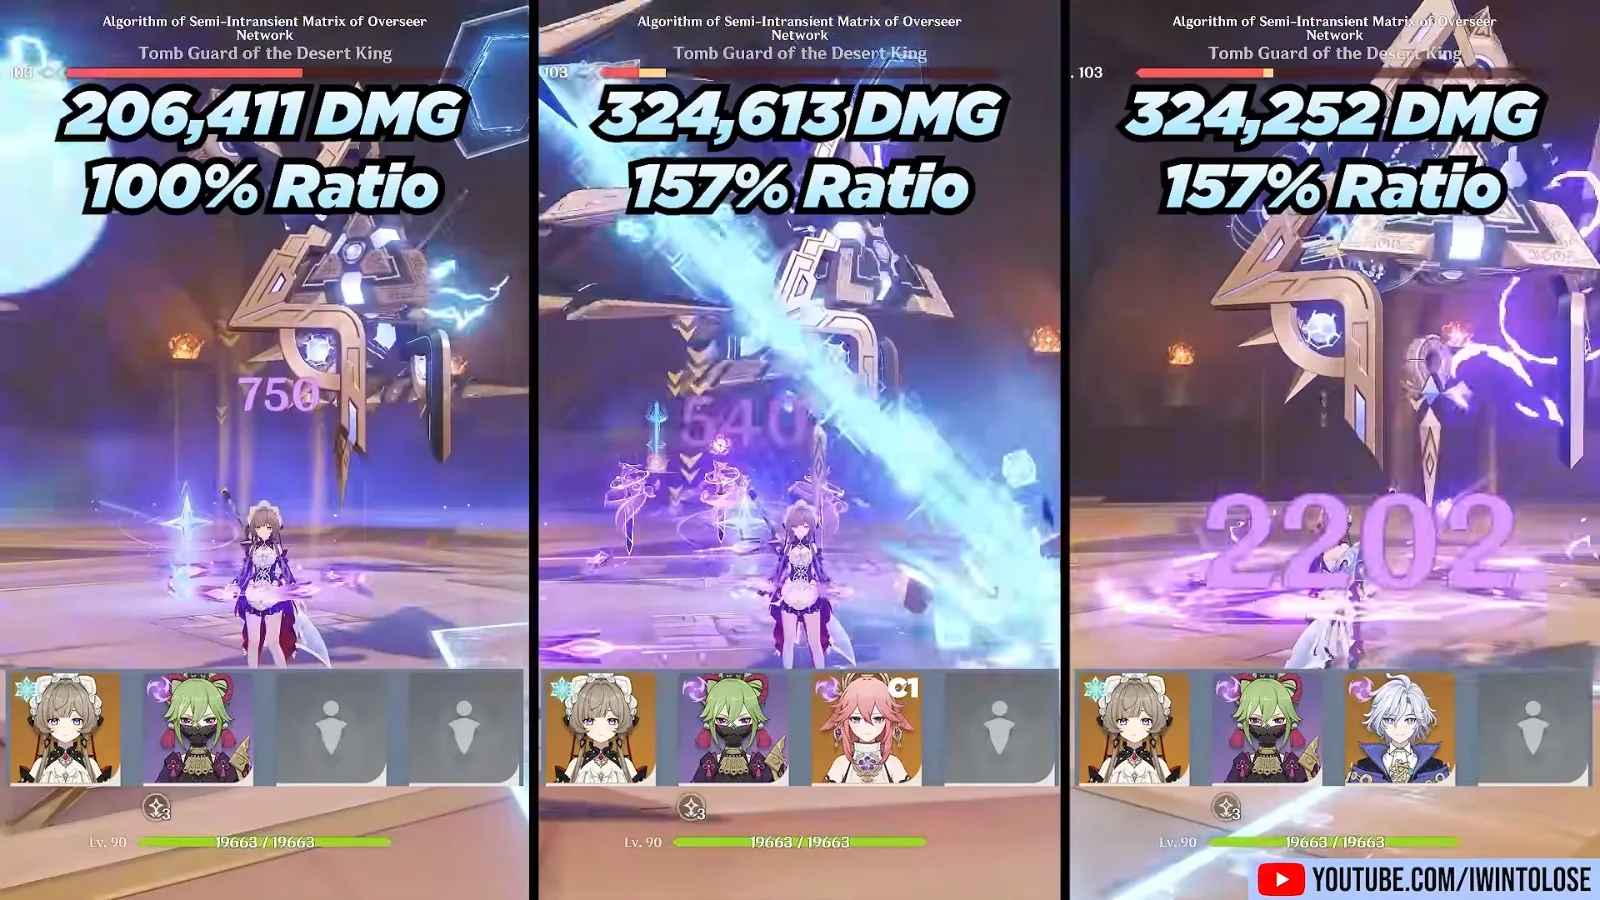
Sandrone and Kuki Shinobu alone deal 206,411 with her Burst; adding C1 Yae Miko gives 324,613, adding Mitya 324,252. Both are a 157% ratio. The difference is Yae Miko’s own damage, which “far exceeds” Mitya’s in the clip. Against Alyosha in Sandrone’s four-character team with no healer, IWinToLose’s line is: with a C6 Alyosha, do not pull Mitya just for Sandrone; at C5 or below, Mitya is “a pretty noticeable upgrade”. The site’s tier list has Alyosha at T0.5 at C6 and T1.5 at C2. Best Sandrone teams has the current line-ups.
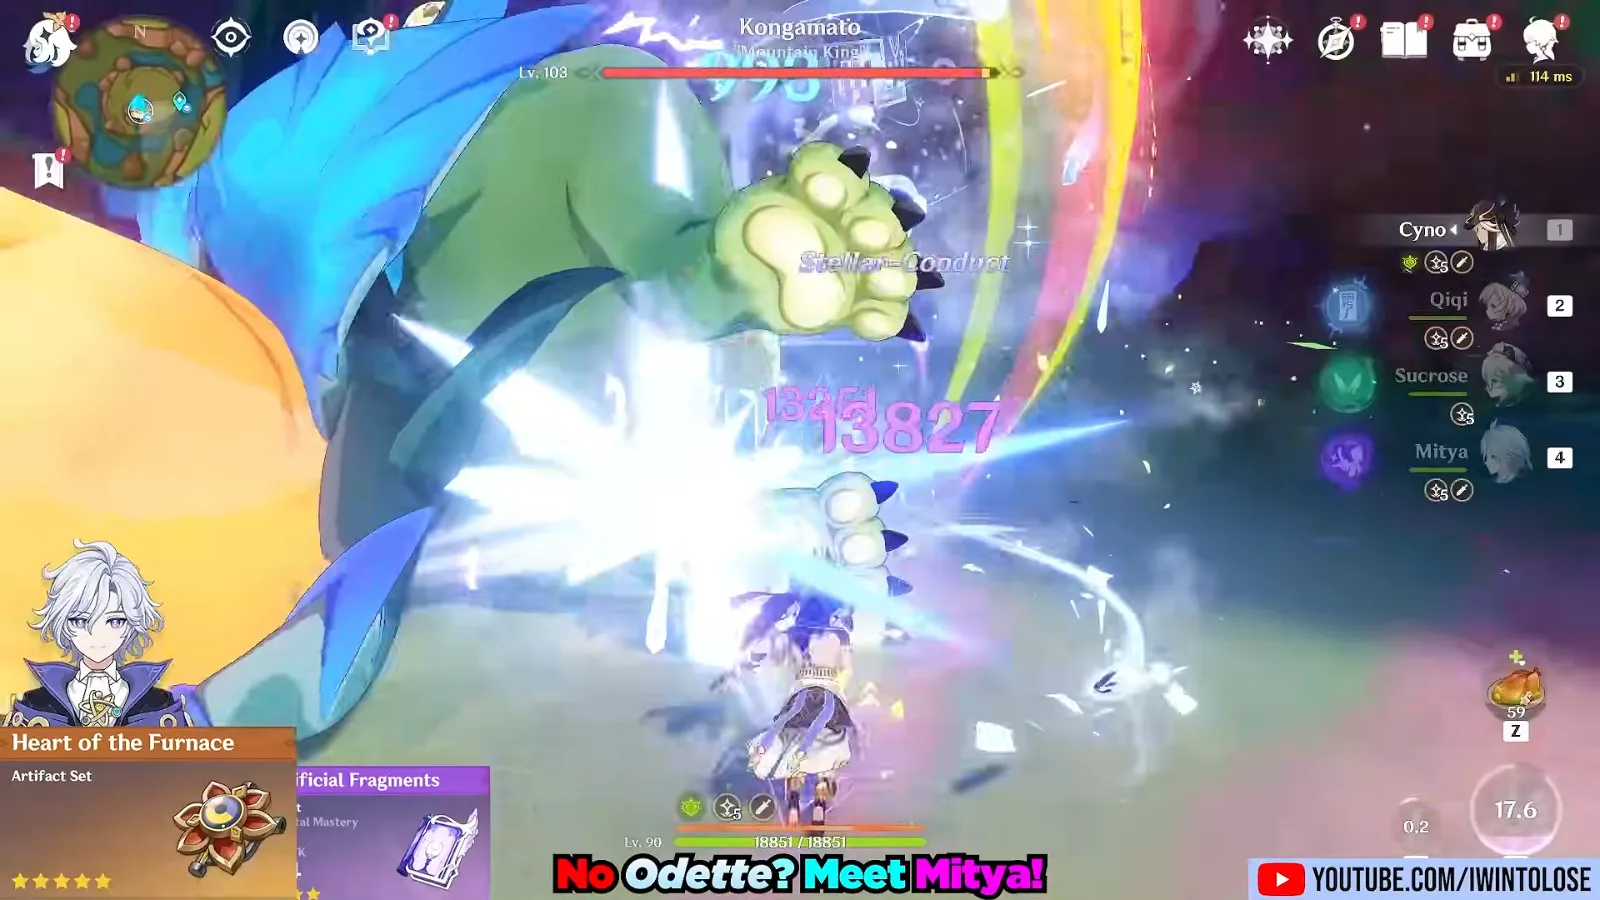
The Cyno Mitya team is the clip IWinToLose titles “No Odette? Meet Mitya!”: Cyno, Qiqi, Sucrose and Mitya. Mitya enables Stellar-Conduct without being “awkwardly incompatible” the way Sandrone or the Cryo Traveler are with other Stellar-Conduct carries, and his five particles help Cyno’s energy. Mitya can play sub-DPS here, or hold Thrilling Tales with Tenacity or Heart of the Furnace. Qiqi earns her place on the site’s data too: while her Herald of Frost is out and she is in Radiance: Stellar-Conduct, her Seven Sacred Treasures passive raises the party’s Superconduct and Stellar-Conduct damage by 50%. The video does not show her build; Qiqi’s page has it, and best Cyno teams the other Cyno line-ups.
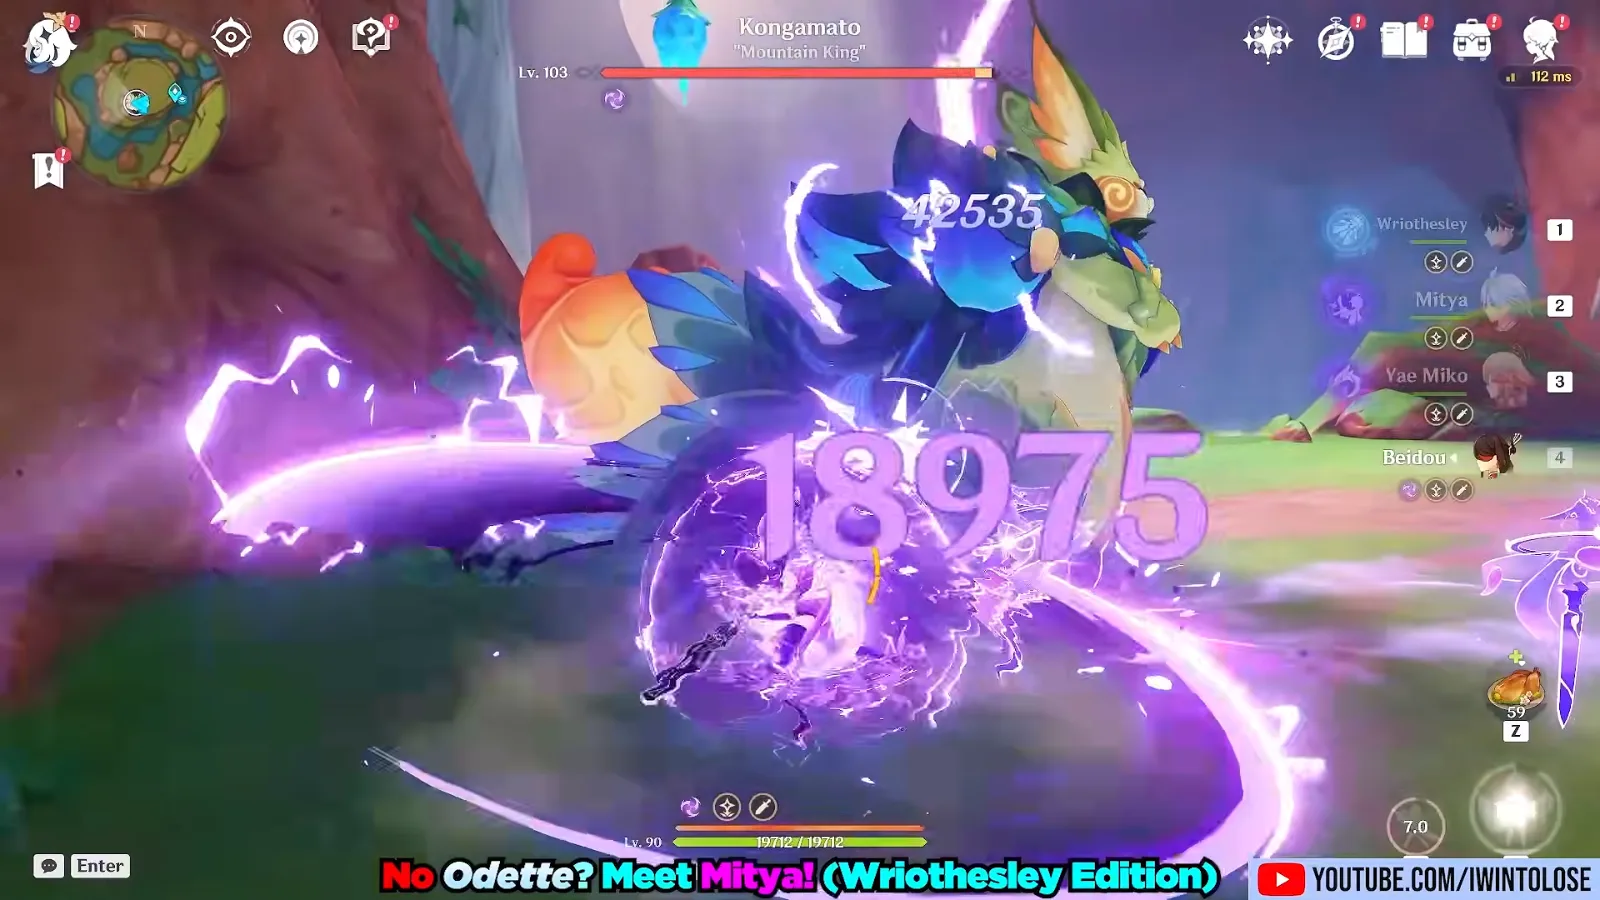
Wriothesley wants teammates who do not heal, since he is his own sustain. Mitya does not heal, and neither does Beidou, whom the auto captions turn into “Bet”. IWinToLose rates Mitya “a slightly more valuable pull” for Wriothesley than for Sandrone, because Alyosha, the free alternative, heals. The best Wriothesley teams page shows his other partners.
Mitya in Stygian Onslaught: clear times against the Wavebinder
Against the new Stygian Onslaught boss, Wavebinder, Greed Amidst the Tempest, IWinToLose’s fastest Mitya clear is 73 seconds with Sandrone, Odette and C1 Yae Miko, and his main DPS Mitya team clears in 90 seconds. These are early access runs with a C0 Valeriy and, in IWinToLose’s words, “free-to-play friendly weapons on everyone”.
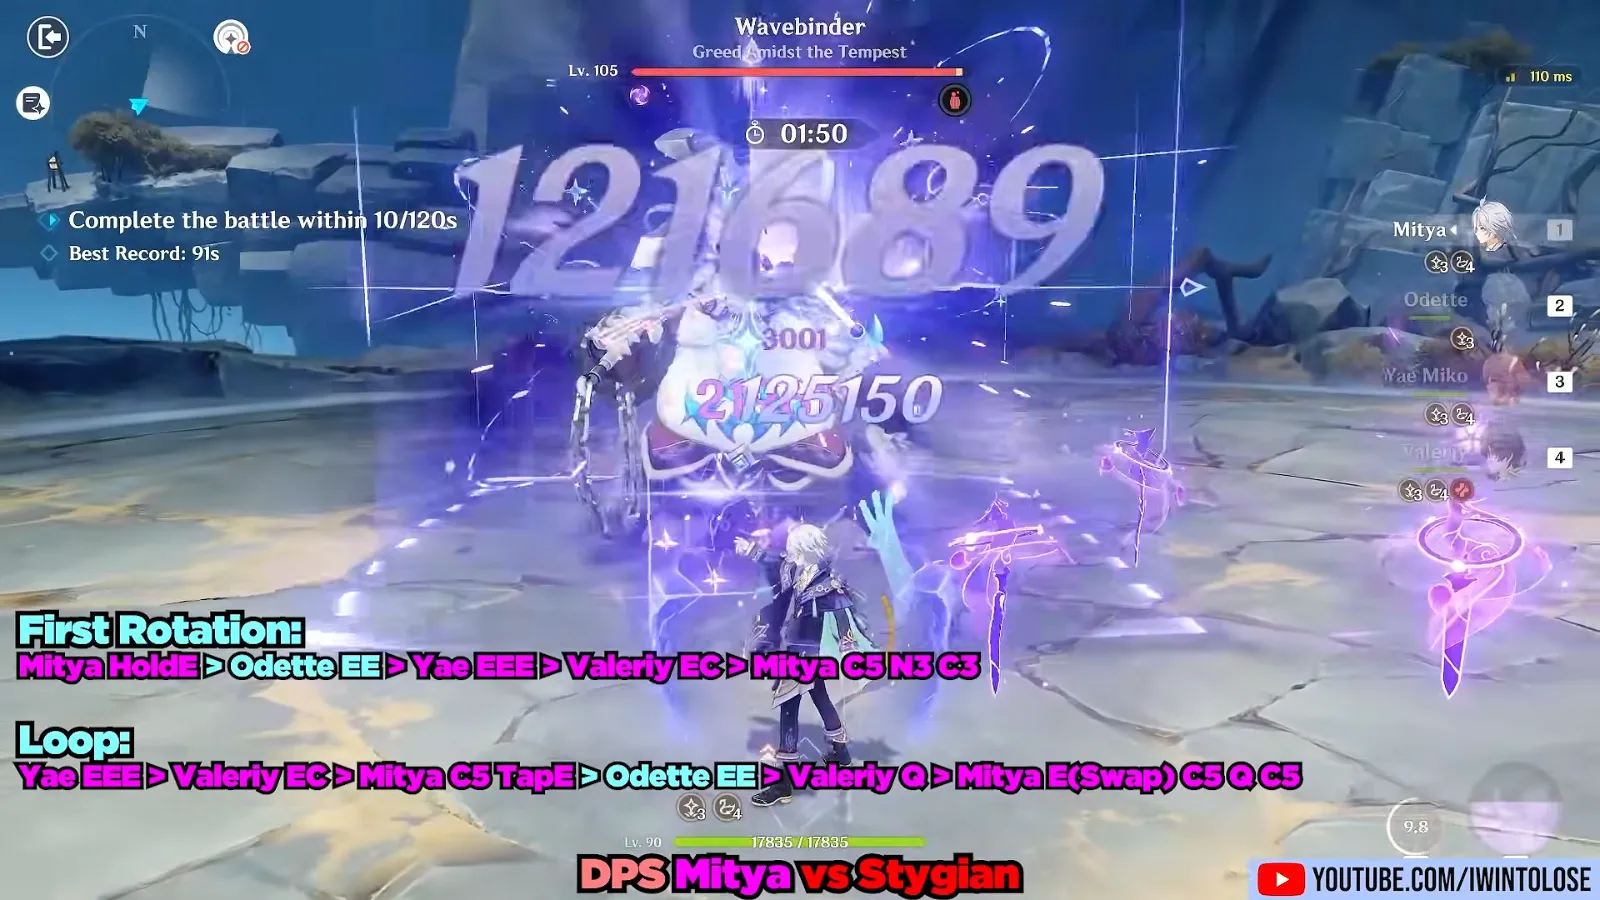
The main DPS run uses the split rotation from the previous section and lands about 14 shots per loop on average, 15 at best, by IWinToLose’s count. The other three line-ups all keep Odette and C1 Yae Miko: C1 Cyno with R5 Deathmatch in 80 seconds, a C6 Cryo Traveler in 80, and C1 Wriothesley in 83. He expects main DPS Mitya to perform “a lot better with constellations on Valeriy”.
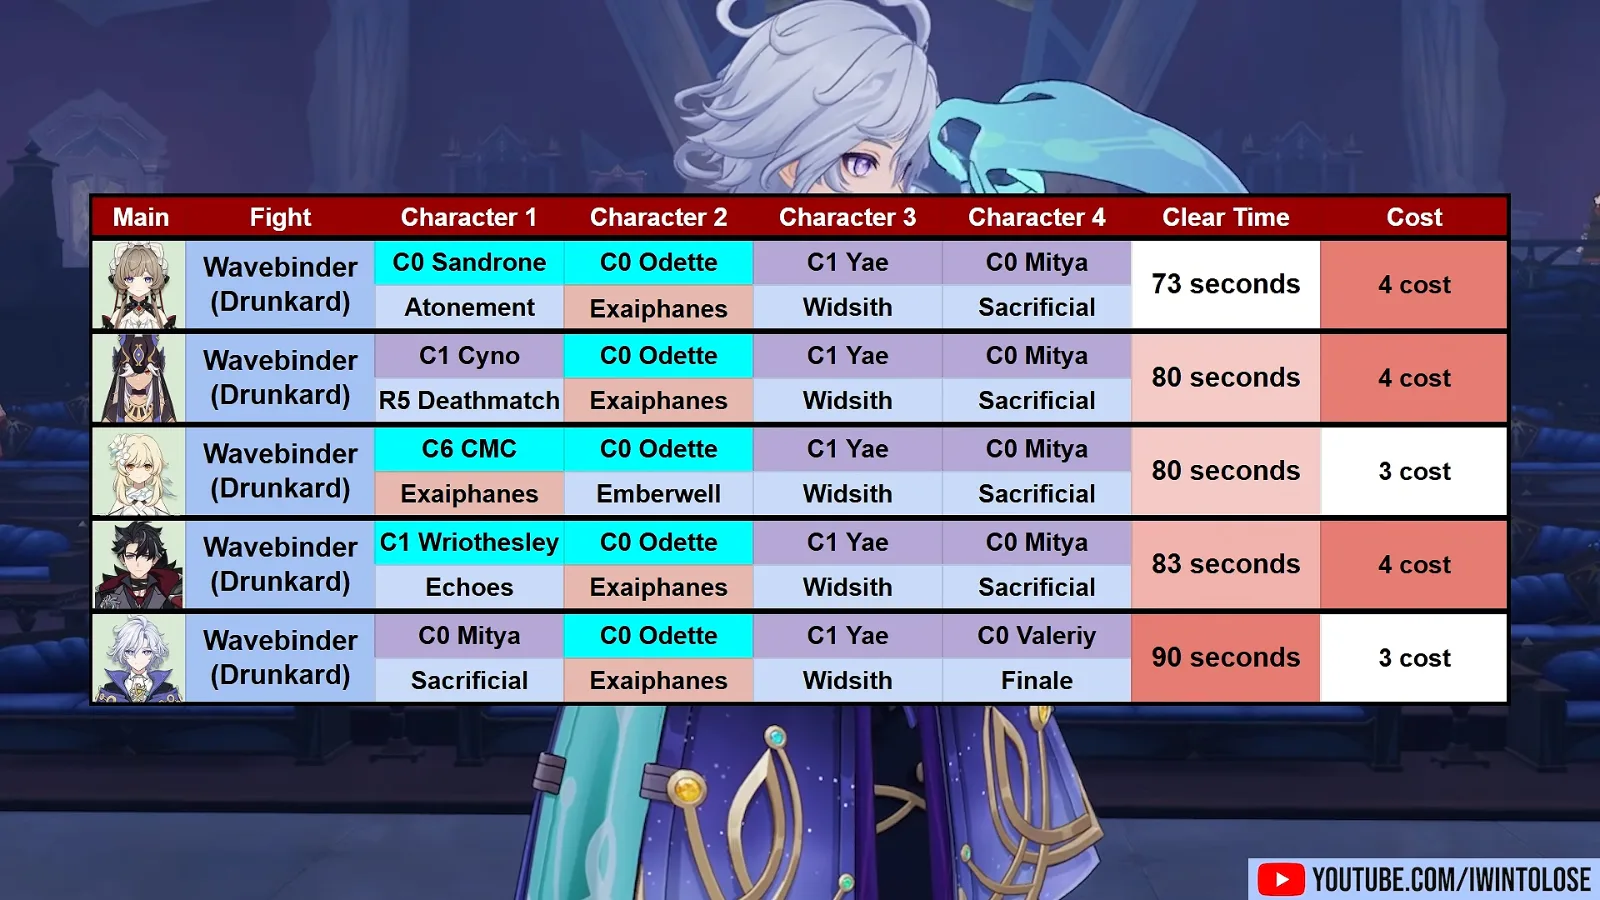
Mitya is not on the site’s tier list yet, since it still carries the 7.1 placements. These five clears are the first endgame numbers for him, and they come from a server where the kit can still change.
Should you pull for Mitya?
Pull for Mitya if you play Stellar-Conduct and enjoy working out rotations; if all you want is an off-field Electro support, IWinToLose advises waiting. As a support he is “a decent option as a fourth slot”, a Yae Miko alternative for many teams and an Odette substitute for Cyno and Wriothesley.
His reason to wait: Danica, an Electro character he expects to be a Stellar-Conduct support or sub-DPS, “might be coming out soon”, and so might the Cryo Archon. Nixo’s 7.2 to 7.8 roadmap places Danica in 7.3. If you plan to invest in Mitya’s constellations, IWinToLose says C1 and C2 are “going to be absolutely crazy”.
Mitya’s banner opens on 4 November 2026 beside a Furina rerun, with Valeriy as the boosted 4-star on both; the 7.2 livestream recap and the banners page carry the details.